Manufacturing 3D Printed Molds for Small Robot Wheels
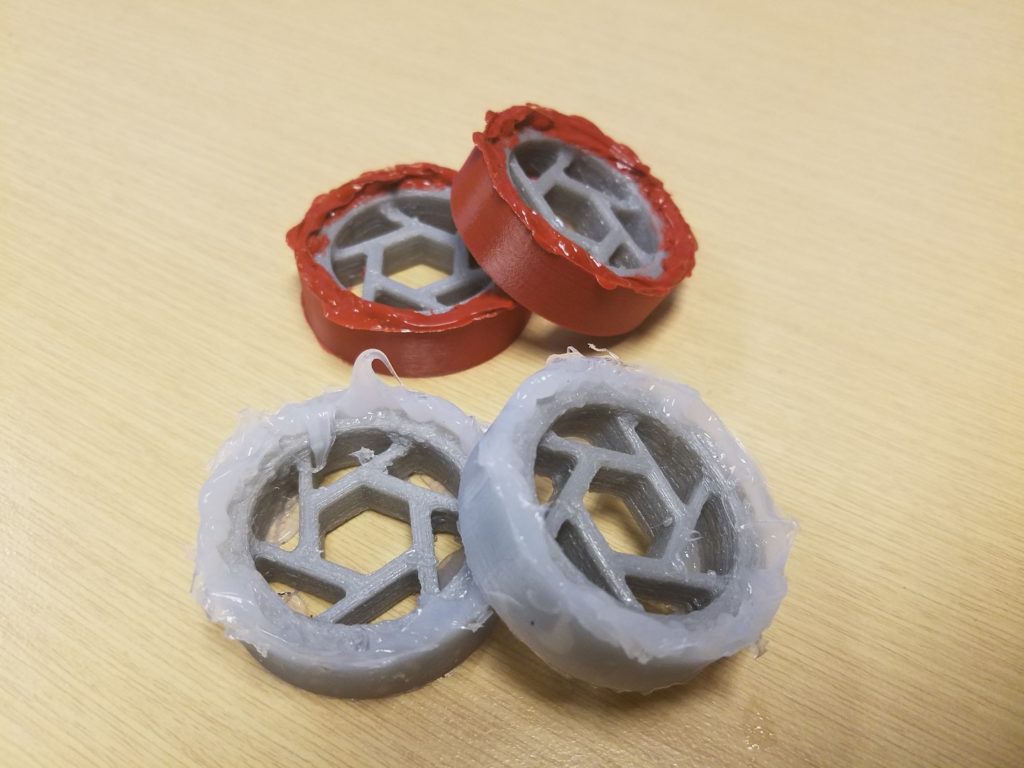
For my antweight combat robot DetCord, I wanted a wheel that could improve upon the Banebots wheels that I used before. I wanted something shock absorbing, which would extend the life of my gearboxes. The tires need to be soft and have high traction. The wheel does not have to be very strong because the robot has thick armour to protect the wheels. I ended up with a cool way to make a wheel that’s cleaner than the more popular methods I see on the internet! I can print the wheel hub in TPU with spiralling spokes for shock absorbtion. But 3D printed TPU is shore 95A and so doesn’t grip as well as the shore 30A Banebot wheels I already have. I need a tire that’s a softer material with high traction. I researched and found plenty of resources on how to make wheel molds for liquid urethane mixtures. But searching around I can’t find liquid urethane in low quantities, and the casting process sounded like a pain. I thought this would be a good challenge, the rules are: only use materials I can 3D print easily, and a single liquid that can be purchased in low quantities and doesn’t require mixing. So I ended up choosing TPU for the wheel hub, PVA for the tire mold, and “liquid gasket” as the tire. My mold is printed out of PVA, it’s a water soluble plastic. So…
From Scratch to Smart: Creating a Custom Lock with EaseLock
Create a custom smart lock device for your existing door that integrates an Atmega328 microcontroller, HC-05 Bluetooth module, and relay module, enabling remote operation from any paired Android device. In this project, We will show you how to build a comprehensive prototype of smart lock step by step with minimal cost. The initial intent with this tutorial was to show you that you can make build this project even if you have little experience with all of the various parts (AVR chips, Bluetooth, Android). We still believe you can if you follow the steps in this tutorial. Getting Started Hardware Tutorial EaseLock Hardware Tutorual Create a custom smart lock device for your existing door that integrates an Atmega328 microcontroller, HC-05 Bluetooth module, and relay module, enabling remote operation from any paired Android device. In this project, I will show you how to build a comprehensive prototype of smart lock step by step with minimal cost. Introduction Developing a product that goes beyond software requires mastering multiple technologies, which can be a daunting task. However, this diversity can also be the most fascinating aspect of the project. Below is a rough diagram that provides a comprehensive overview of the project. It illustrates all the necessary components and should give you a general understanding of how this system functions. In general, this project allows to open your door via Bluetooth. Components Summary Essential Hardware Components for the Project:…
Design of Car Head-Up Display Using LED Strip
This is the next step in my mission to make my car function 7 years newer and feel like a jet cockpit. (click here if the above video isn’t loading) I wanted a HUD, Heads Up Display to my car. The main purpose is to let me keep my eyes on the road and still be aware of my speed without looking down, hence “heads up”. This idea has been used in fighter jets for decades now. I do not like any of the other ones on the market today, they all try to do “too much”. I wanted something more simple and elegant. My design is a simple RGB capable individually controllable LED strip that reflect off my windshield. I used the “DotStar” from Adafruit Industries, which uses APA102 LEDs. The brain is a Teensy 3.2, which is connected to my car’s CAN bus via a OBD-II connector (the diagnostic port that you can read the engine computer from). It is programmed to have three different modes: voltmeter, tachometer, and speedometer. The mode switching is “context aware”: When the car is moving, the mode changes to speedometer. If I rev the engine without the car moving, the mode changes to tachometer. When the engine is off, the voltmeter shows me the car’s battery voltage. When transitioning between the modes, there’s a few preset transition animations that are randomized. When the car is off, the circuit goes into sleep mode. Click play on the video below…
Pressure Resistance Calculator
This is a special resistor voltage divider calculator. You tell it what is the maximum expected input voltage and the maximum desired output voltage, and a list of all the resistors you already own, and it automatically picks the two resistors you should use. This is useful because it means you don’t have to buy a specific resistor for a project, and you don’t have to calculate for every single resistor you own. Continue below to use List of ResistorsPut a list of all the resistors you would like to use, use numbers only, separated by spaces or a new line. Units don’t matter as long as the units are all the same. I came up with this tool when I was trying to use a ADC of a microcontroller to read battery voltage. The microcontroller had an internal voltage reference option of 1.8V, and my battery pack could have been a fully charged 3S li-po pack, which meant 3 * 4.2 = 12.6V. I had enough resistors in my collection that I knew there must’ve been two values that got an output close to 1.8V so I wrote this tool to help me pick. Remember, you don’t need to get an result exactly equal to the reference voltage of the ADC if your microcontroller can do some simple math to calculate the true reading. This tool is open source, written in javascript, so you can…
3D Printed Peristaltic Pump
I 3D printed a very durable peristaltic pump. It is capable of pumping very thick liquids at as much pressure as the tube can handle. It is durable because it is printed at 100% infill at high thicknesses and uses steel ball bearings. It is capable of such strength because it is using a massive 12V DC brushed motor that has a 150:1 gear ratio metal gear box, which means several kilograms of torque. For design files and more details, please continue reading. Purpose: My grandfather (living in China) has esophagus cancer and needs to eat through a feeding tube. The liquid food he needs to eat is quite thick, and it is usually pushed through a syringe. But this takes a lot of strength and me, my dad, and my uncle are the ones doing this. But I live in the USA, my dad lives in Canada, and my uncle is in China and don’t have any more days off, meaning my grandmother needs to feed my grandfather. My grandmother does not have the strength to push the thick liquid through the syringe. So hence I decided to build a pump for them. 3D Print: The biggest challenge here is caused by the fact that the plastic is printed hot and then cools during the print. This means there’s some shrinkage, which causes bed adhesion problems (corners lifting during print, my new solution click here) and dimensional…
EaseHome: Unlock the Future of Smart Home Automation
EaseHome is a revolutionary smart home chatbot that lets you control and monitor your home with ease. Using natural language processing and machine learning, EaseHome understands your voice commands and responds accordingly, making it easy to manage your home’s temperature, lighting, security, and more. With EaseHome, you can experience the future of smart home automation today. Getting Started EaseHome Tutorial Welcome to EaseHome: A Smart Home Chatbot Tutorial Imagine being able to converse with your home, effortlessly asking questions like “What’s the current temperature?” or “Are all doors locked?” and even controlling your home’s settings with simple voice commands like “Set the kitchen temperature to 19°C!” This futuristic vision, inspired by movies like “Minority Report,” is now within reach. In this tutorial, we’ll explore how to integrate a cutting-edge text recognition system into a smart home system using the Microsoft Bot Framework and Language Understanding Intelligent Service (LUIS). The Dream of a Smart Home The concept of a smart home has long fascinated us. With the advent of voice recognition and text-based interfaces, we can now bring this vision to life. Our goal is to create a seamless interaction between humans and their homes, enabling users to effortlessly control and monitor their living spaces. This tutorial will guide you through the design and implementation of EaseHome, a smart home chatbot that leverages the power of natural language processing and machine learning. What to Expect In this…
Rev Up the Future: Building the Ultimate Autonomous RC Car with EaseCar
Get ready to revolutionize the world of remote-controlled cars with EaseCar, a cutting-edge project that’s about to take autonomous driving to new heights. Imagine a car that not only responds to your every command, but also navigates through obstacles with ease, all while live-streaming its journey to the world. What sets EaseCar apart is its innovative fusion of multiple technologies, creating a seamless and immersive experience that tackles real-world challenges. This isn’t just about controlling a car with voice or gestures – it’s about creating a futuristic vehicle that can think for itself. As a seasoned developer with a passion for IoT, I wanted to push the boundaries of what’s possible with intelligent hardware and software. I envisioned a project that would not only impress, but also provide tangible value to users. That’s why I embarked on this ambitious journey, combining the latest advancements in Intel Edison, computer vision, and machine learning to bring EaseCar to life. In this series of tutorials, we’ll take you on a step-by-step journey to build EaseCar from the ground up. Whether you’re an experienced IoT developer or a C# enthusiast, you’ll discover valuable insights and techniques to enhance your skills. So, fasten your seatbelt and get ready to experience the future of autonomous driving today! EaseCar Tutorial Revolutionizing the World of RC Cars When it comes to hacking RC cars, we’ve seen it all – from Bluetooth connectivity to gesture…
ARUCI Project: Our Fourth Year Design Work
We turned my phone into a universal remote that uses augmented reality. We can track the location of objects and identify them in real time, so we can overlay an icon representing the object on the video shown on the touchscreen. Simply click on the object to interact with it. It’s all wireless, no base station required. Actual video is 1080p, I recommend you view it full screen. Presentation slides: without notes and with notes Photos:http://imgur.com/a/oRjll Our group did circuit and PCB design, we did the soldering, we designed the phone casing, we designed all the IR and RF protocols, we wrote our own firmware and Android app. We have many visions on how to improve our system. We know how to improve our noise and interference immunity, plus increase the tracking speed performance. We have several ideas on how to make the phone-attached-circuit less bulky. We know how to use multiple emitters to estimate the object’s size and orientation. We are trying to gauge interest in our project, to see whether or not to continue the project, and in which direction to take it in. Abstract (exactly as we submitted it) Augmented reality provides individuals with a virtually enhancedmethod of viewing and interacting with the world around them. TheAugmented Reality Universal Controller and Identifier (ARUCI) is areal-time system that integrates remote object control with augmentedreality to view and control various objects through an interactivevisual interface that can be…
3D Printed All-In-One Mechanical Iris Dome
It’s that time of year when we think about gift giving. I decided to design a dome shaped box that opened with moving curved doors. (dear iPhone users, sorry if the videos don’t work for you, please consider upgrading) Keep reading for more pictures and a full tutorial teaching you how to create this in CAD. What makes this extra cool is that all of this is 3D printed as one piece, there is no assembly required! I will show you how I designed this, step by step (plus why I did it that way), using a mechanical 3D modelling CAD tool called Onshape. I will focus on the things that showcase the power of a “parametric feature based modeling” CAD tool, and how it eliminated some of the problems me and other people have faced with other similar designs. When I modeled this design, I paid extra attention for the dimensions to be adjustable without compromising the 3D-printability of the design. Simple Explainations First, take a good look at the animation of how this box actually works. There are two shells that sandwich a set of door pieces. The door pieces rotate about a hinge that protrudes from the inner shell. The door pieces also have a slot that bounds a pin, the pin protrudes from the outer shell. As the outer shell rotates clockwise, the pin pushes against the slot, causing the door to rotate upwards.…
Intelligent Waste Sorting System
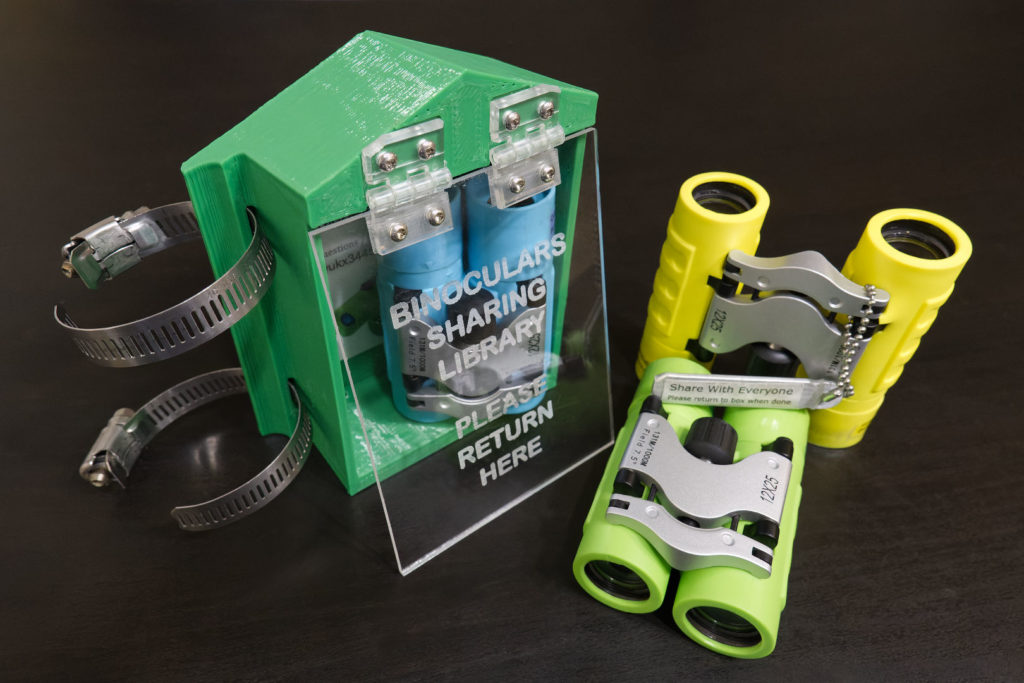
You might be enjoying a trip to the Pacific coast one day, hoping to see some whales, and stumble upon this… just felt like doing a little nice thing for the world… …in my own way, proudly made on my Hephaestus and my Beamo Welcome to the trail leading up to Mori Point! One of my favorite places… Bonus: some gifts to the library I volunteer at During the madness that is 2020, I was fortunate enough to be able to enjoy the outdoors more. At one point, I got some really nice binoculars, and they felt like a superpower! I have been letting people use my binoculars at a local whale-watching spot, and I’ve gotten some great reactions. So I decided that some binoculars should just be there for everybody to use (no coins required!). Conveniently, there’s a fence post up on the cliff, and also a little-free-library at the hiking trail entrance! For the fence post, I designed a little house to for the binoculars to live in! It’s made of 3D printed PETG plastic and the cover is clear acrylic plastic with the text laser engraved. Of course I totally expect these to be stolen, broken, vandalized, bitten, or thrown off the cliff… I shopped around for some small cheap $20 binoculars, cheap since I’ll be replacing them quite frequently. In my shopping, I got curious about some playfully coloured ones that claim to have 12x zoom. What…
 Aquarium Computer
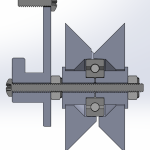 Ultimaker2 Bearing Spool and Bearing Guide Upgrade
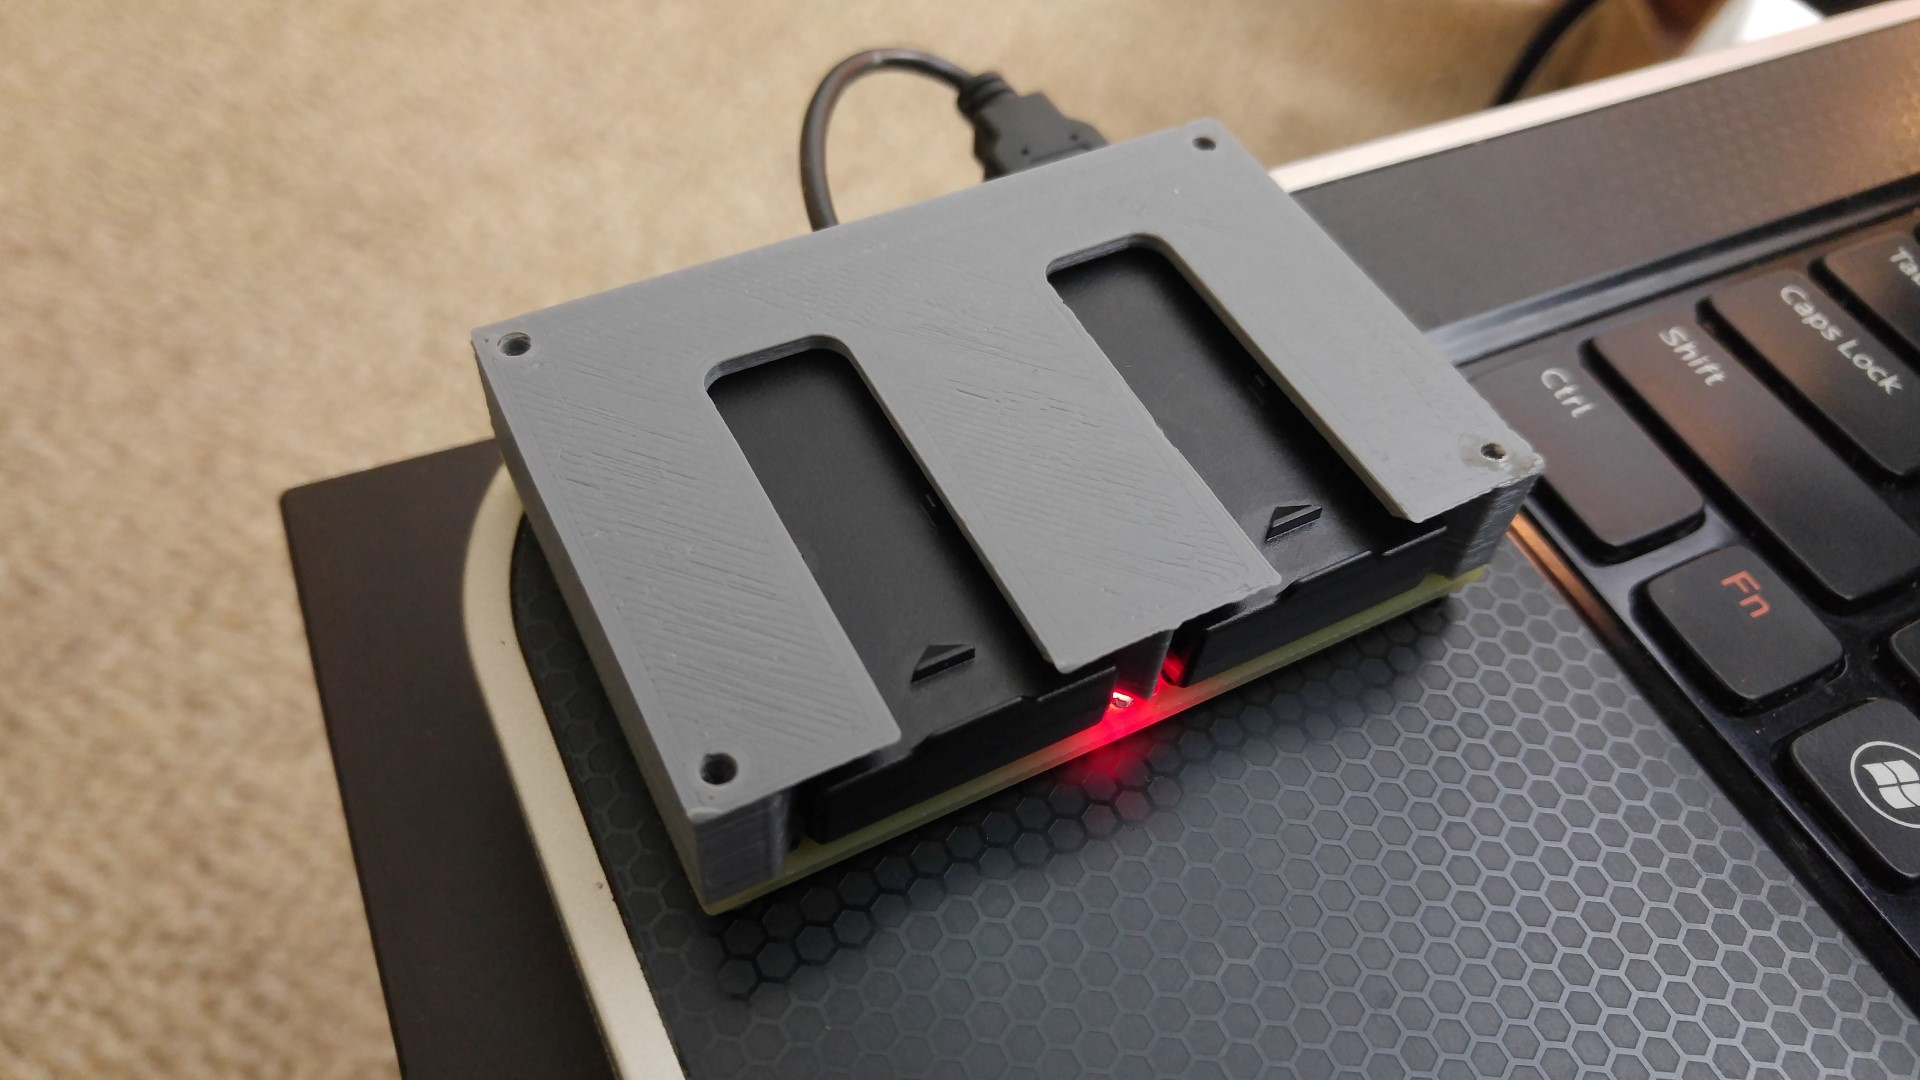 3D Printed Battery Recharge Dock for Parrot Rolling Spider
 Using a Laptop as a Monitor for a Headless Raspberry Pi
 Introduction to tinyAVR Microcontroller Attiny404 Architecture, Features, and Related Registers with a Simple Code Example
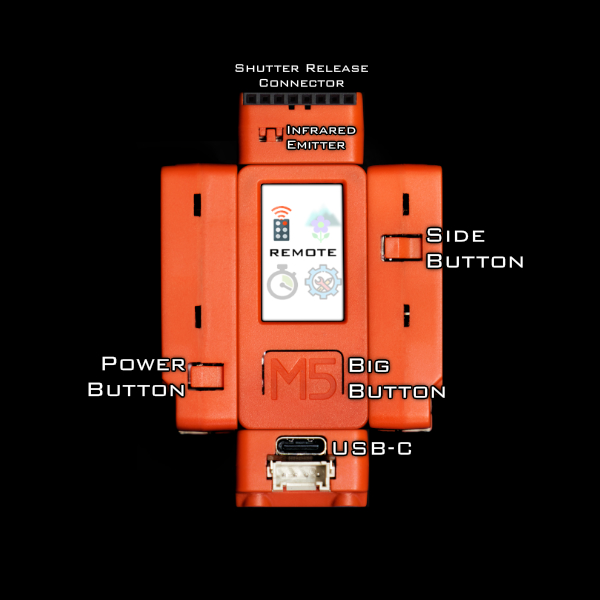 Wireless Camera Controller:Alpha-Fairy
 Toaster Oven Conversion: A DIY Reflow Soldering Solution
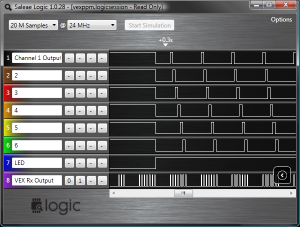 VEX Pulse Position Modulation Wireless Signal Decoder