
Introduction to tinyAVR Microcontroller Attiny404 Architecture, Features, and Related Registers with a Simple Code Example
In this continuation of the tinyAVR tutorial series, this blog post delves into the AVR CPU architecture, capabilities, and registers. Table of Contents Features Overview AVR is a well known 8-bit CPU. The CPU is a heart of the device which can access memories, do calculations, execute instructions, control peripherals as well handle interrupt routines. Most part of this post is based on the official Attiny404 documentation, so for in-depth info check the datasheet. Architecture AVR CPU uses a Harvard architecture with separate buses for program and data. While one instruction is being executed by the CPU, the second is being fetched from the program memory – this pipeline allows instructions to be executed on each clock cycle. As you can see in the image above, the CPU has ALU – Arithmetic Logic Unit. It can do logic and/or arithmetic operations between two registers or a constant value and a register. Also, ALU can execute single-register operations. When the ALU finishes an arithmetic operation, the STATUS register gets updated with the information about the operation end result. The ALU can directly access to a register file which consists of 32 8-bit general purpose working registers. All these registers have single clock cycle access time. To sum up, this allows single cycle arithmetic operations between two registers. Memory overview The program memory bus is directly connected to Flash, the addresses start from 0x0000. Whole data memory space is…

Toaster Oven Conversion: A DIY Reflow Soldering Solution
As I get more serious into my electronics hobby, I need to work with more SMD components. Some component packages are very difficult or impossible to solder with a traditional soldering iron. To solve this problem, I decided to hack a toaster oven to become a reflow soldering oven. Basically, to perform reflow soldering, solder paste is placed on a printed circuit board, and the components to be soldered is placed on top of the solder paste. When the oven heats the solder paste past the melting temperature, the solder paste melts and solders the component to the circuit board. To control the oven’s temperature, I created my own reflow toaster oven controller circuit. This circuit uses an ATmega32U4 microcontroller to monitor the oven’s temperature using a thermocouple and AD595AQ, and then control the oven’s heating element using a solid state relay. The controller features USB logging/debugging, USB bootloading, a graphic LCD display, and 3 buttons. The firmware features tweaking for all settings, manual temperature control, manual heating element control, and automatic temperature profile control (with a nice temperature history graph display). This circuit will plug into a wall outlet, and the oven will plug into this circuit, while the solid state relay basically acts as a switch between the wall outlet and the oven’s heating element. Safety is the main design objective (but some things were limited by cost), and ease of use is the…
VEX Pulse Position Modulation Wireless Signal Decoder
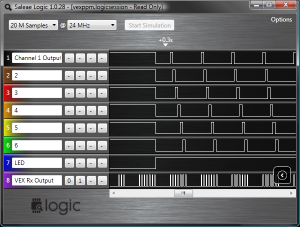
1 Reply This is a PPM signal splitter for use with the VEX radio transmitter/receiver kit sold at All Electronics (item is now gone from their web site, this article itself is extremely old and outdated because newer technology has arrived) For $30 at All Electronics, you can buy a 6 channel radio transmitter and receiver. The transmitter is excellent for $30, trim, scaling, mixing are all programmable on the transmitter itself and it stores several configurations. The receiver only has one output pin, which outputs a PPM signal which needs to be split into individual channels in order to be able to control servos. If you put the receiver right side up and with the socket facing you, the pin on the far left is the Vdd pin, connect this to a regulated 5 volt power supply, the middle left pin is the PPM output pin (it is open collector so a pull up resistor is needed), and the middle right pin is the Vss pin, connect this to your circuit’s ground, the far right pin is not connected to anything inside the receiver. The 6 channel PPM signal has 7 periods of high and low pulses, each of these pulses all start with a high period of 500 microseconds, and a low period of varying lengths. The first low period is a sync pulse with a fixed low period of about 7 milliseconds, this…
Beamo Laser Cutter Review
I finally took the plunge and bought myself my very own laser cutter! It’s a cute little Flux Beamo! A small but modern 30W CO2 CNC laser cutter/engraver. Here’s what I think of it… The Flux Beamo claims to output 30W of optical power at 10.6um wave length. The workspace area is about the size of a sheet of paper, 300mm x 210mm. It has modern features such as a touch screen, camera preview, and WiFi. It can also be upgraded with a “autofocus” attachment, and a rotary attachment. It also advertises to be capable of 1000 DPI of resolution, meaning each pixel is 0.02mm, which is half bull****, the stepper motors are capable of that sort of resolution but the laser beam itself is larger (depends on focus and settings and the area of material being melted), all CO2 lasers are like this. The capabilities of the laser is supposed to be enough to cut and etch clear acrylic. Other “easy” materials like wood and leather it’ll have no problems with. It also claims to be able to etch glass, and even stainless steel if you coat the steel with a special coating first. 30W is still on the weaker end of the market, it means the cut depth isn’t very thick and the speed will be slower, but these are problems that can be mitigated or ignored. Out of the box, it worked, I…
Wooden Orrery: Laser Cut Project
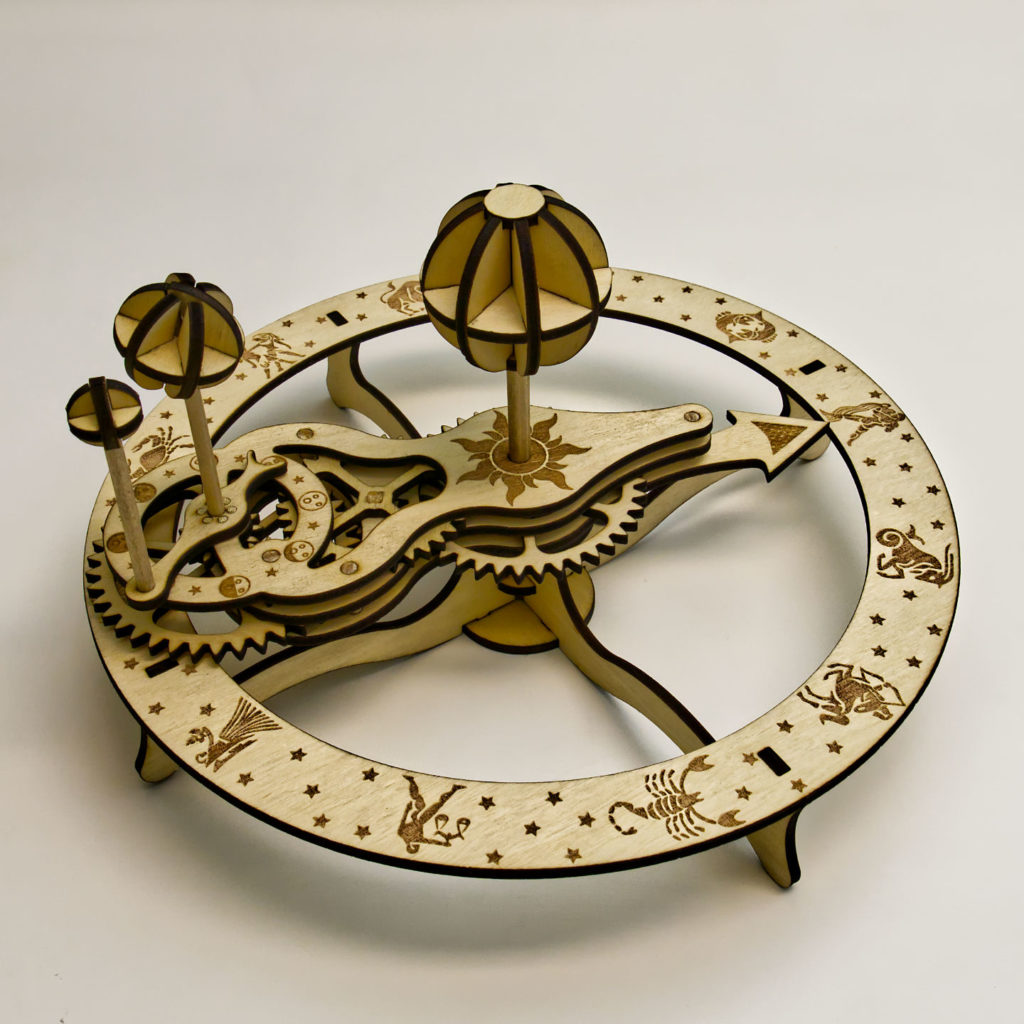
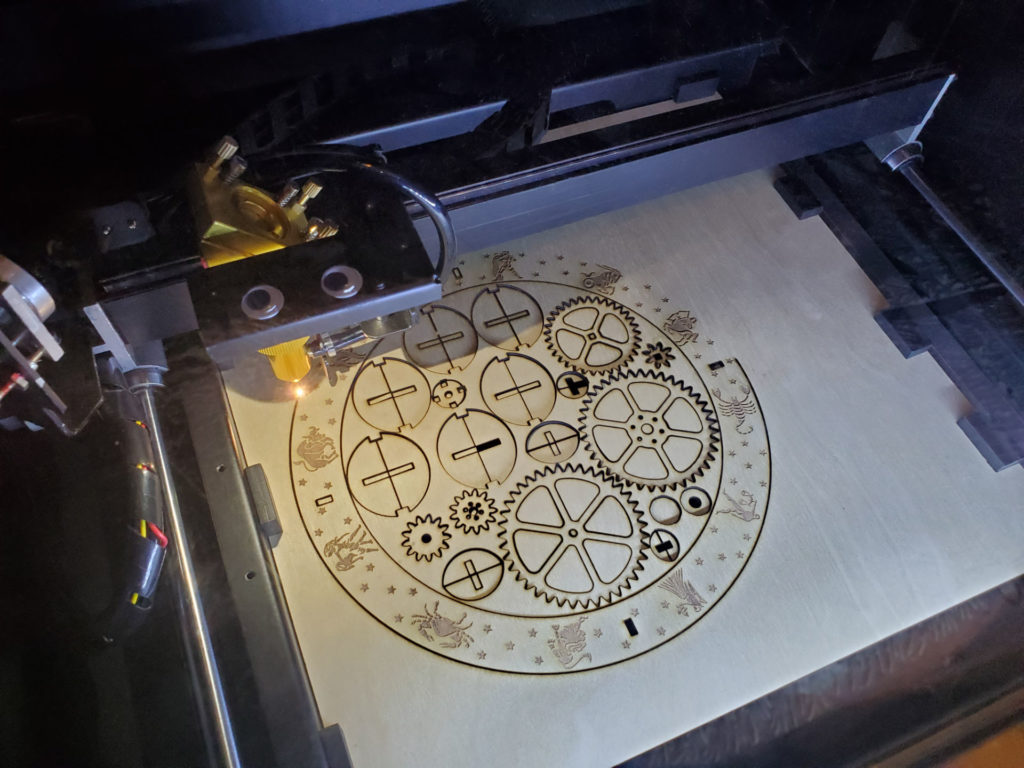
Orrery – Laser Cut Wood Project 5 Replies I’m having so much fun with my new Beamo laser cutter! I designed and made this wooden orrery with my Beamo. It’s a mechanical toy that depicts the position of the Earth and Moon as they orbit each other and the Sun, with artwork showing the moon phases and Zodiac. See more pictures and animation: All files are open source and available on my GitHub repo (click here)! I have provided the two SVG files to be cut on the laser cutter, optimized for the Beamo but should work on any other laser. The 3D models I designed using SolidWorks is also available. Assembly instructions are provided in the repo as well. Originally designed in SolidWorks. The parts were then exported to SolidWorks drawing files, then exported to DXF files, then imported into Inkscape to be edited as SVG files. Inside Inkscape, paths were joined together to optimize cutting. Paths that represented circles, squares, and slots, were converted into basic shapes so cut tolerances can be adjusted. Finally, the cutting order was organized into layers. Beam Studio will import the layers in the order you defined them. I learned the hard way that you need to make inner cuts first before outer cuts. Otherwise, if you do an outer cut first, the piece will move after being cut free and fall onto the laser’s honeycomb bed. This means the inner cut…

Geeky Stained Glass
It’s nearly Christmas again! I’ve started to learn a new craft, an ancient one, and started to mix it up with modern technology. Behold, stained glass suncatcher with embedded LEDs This is essentially black magic to most glass artists and a huge “duh” moment to all the makers and engineers. I’ve been asked to teach how this is done… Just a teaser preview of my second project Before I start talking about the geeky part, I’d like to summarize the basic steps in making a basic piece of stained glass artwork like this:
Intelligent Waste Sorting System
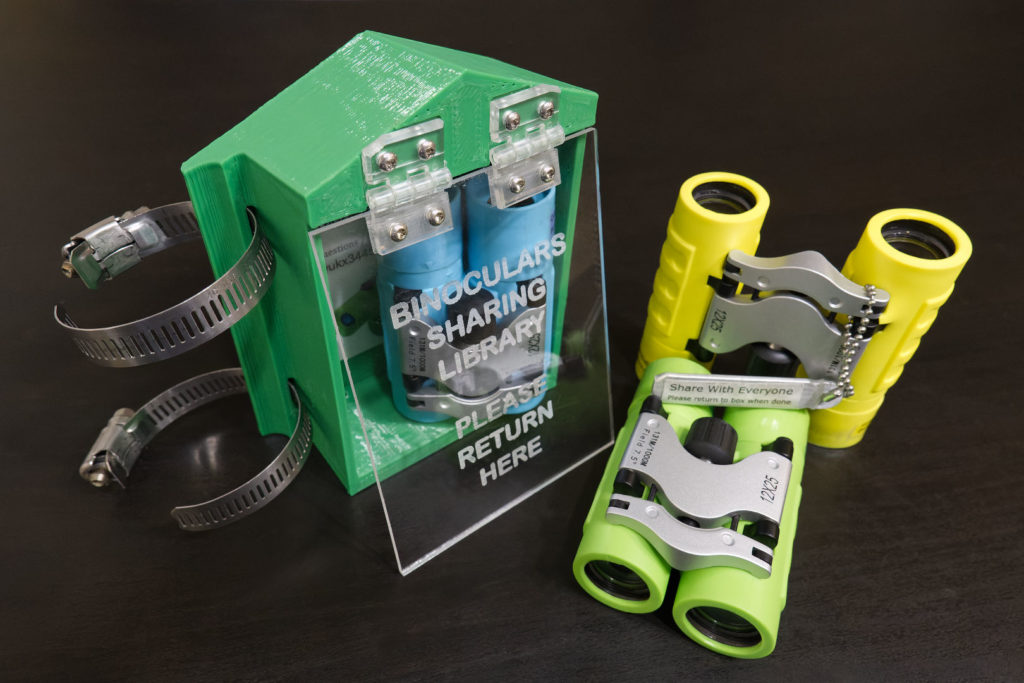
You might be enjoying a trip to the Pacific coast one day, hoping to see some whales, and stumble upon this… just felt like doing a little nice thing for the world… …in my own way, proudly made on my Hephaestus and my Beamo Welcome to the trail leading up to Mori Point! One of my favorite places… Bonus: some gifts to the library I volunteer at During the madness that is 2020, I was fortunate enough to be able to enjoy the outdoors more. At one point, I got some really nice binoculars, and they felt like a superpower! I have been letting people use my binoculars at a local whale-watching spot, and I’ve gotten some great reactions. So I decided that some binoculars should just be there for everybody to use (no coins required!). Conveniently, there’s a fence post up on the cliff, and also a little-free-library at the hiking trail entrance! For the fence post, I designed a little house to for the binoculars to live in! It’s made of 3D printed PETG plastic and the cover is clear acrylic plastic with the text laser engraved. Of course I totally expect these to be stolen, broken, vandalized, bitten, or thrown off the cliff… I shopped around for some small cheap $20 binoculars, cheap since I’ll be replacing them quite frequently. In my shopping, I got curious about some playfully coloured ones that claim to have 12x zoom. What…


