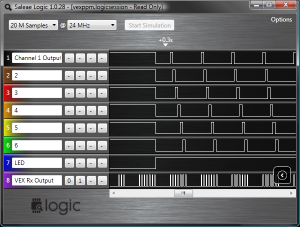
VEX Pulse Position Modulation Wireless Signal Decoder
1 Reply This is a PPM signal splitter for use with the VEX radio transmitter/receiver kit sold at All Electronics (item is now gone from their web site, this article itself is extremely old and outdated because newer technology has arrived) For $30 at All Electronics, you can buy a 6 channel radio transmitter and receiver. The transmitter is excellent for $30, trim, scaling, mixing are all programmable on the transmitter itself and it stores several configurations. The receiver only has one output pin, which outputs a PPM signal which needs to be split into individual channels in order to be able to control servos. If you put the receiver right side up and with the socket facing you, the pin on the far left is the Vdd pin, connect this to a regulated 5 volt power supply, the middle left pin is the PPM output pin (it is open collector so a pull up resistor is needed), and the middle right pin is the Vss pin, connect this to your circuit’s ground, the far right pin is not connected to anything inside the receiver. The 6 channel PPM signal has 7 periods of high and low pulses, each of these pulses all start with a high period of 500 microseconds, and a low period of varying lengths. The first low period is a sync pulse with a fixed low period of about 7 milliseconds, this…
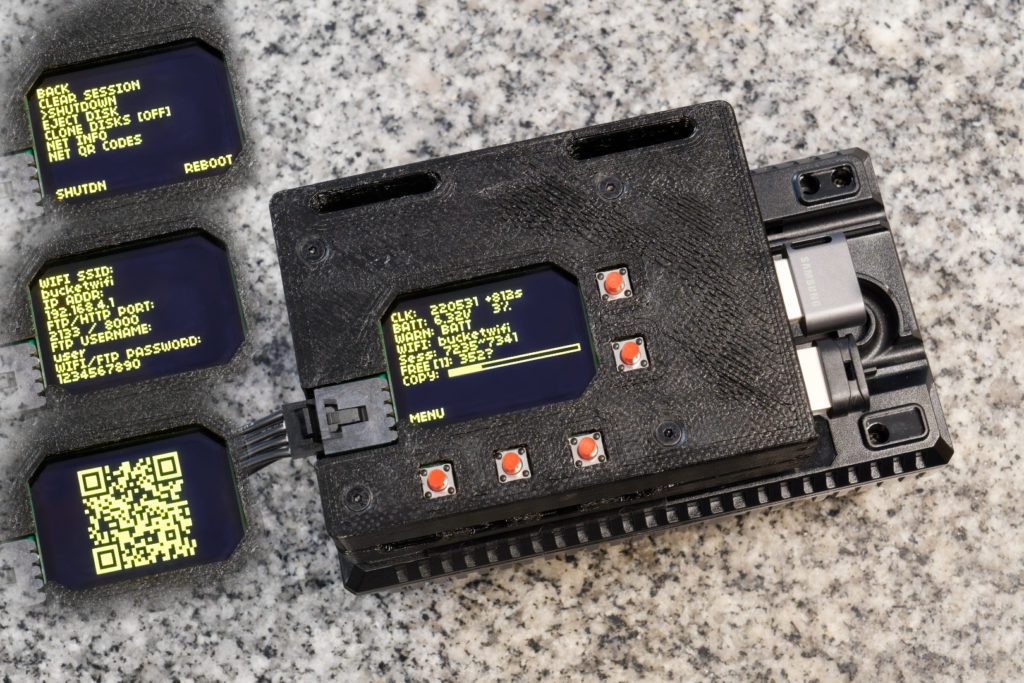
Bucket: Intelligent Photo Backup and Selector
This is a tool made to transfer and backup photos from a professional camera while in-the-field. Built with a Raspberry Pi 4 (other Pis will work too, it’s all just Python code), using Wi-Fi for file transfers and USB disks for file storage, powered by batteries. While on photography trips, I’m running out of storage on my camera’s memory cards. They are expensive memory cards and I can’t buy too many of them ($400 for 160 GB, and the camera needs two). I don’t want to go back to a hotel before clearing out a memory card either. So the strategy is to wirelessly transfer the files into a cheaper-slower-but-bigger storage device (TB sized USB disks) simultaneously as the camera is shooting. The slower speed should be fine because the transfers will happen during the down-time, when I’m walking around not taking pictures. USB disks at this size typically cost just a bit over $100 (genuine, authentic, non-scam ones) and require USB-3.0 ports. Once the photos are in the bigger storage device, I can clear the expensive-and-smaller memory cards without going back to a hotel, using in-camera quick-reformat. This project needs to be done by late June of 2022, my next vacation. (I hope this explains some very weird decisions I’ve made) Features ♦ Runs as a FTP server for professional cameras to transfer photos into. A redundant copy of the photo is made if 2…
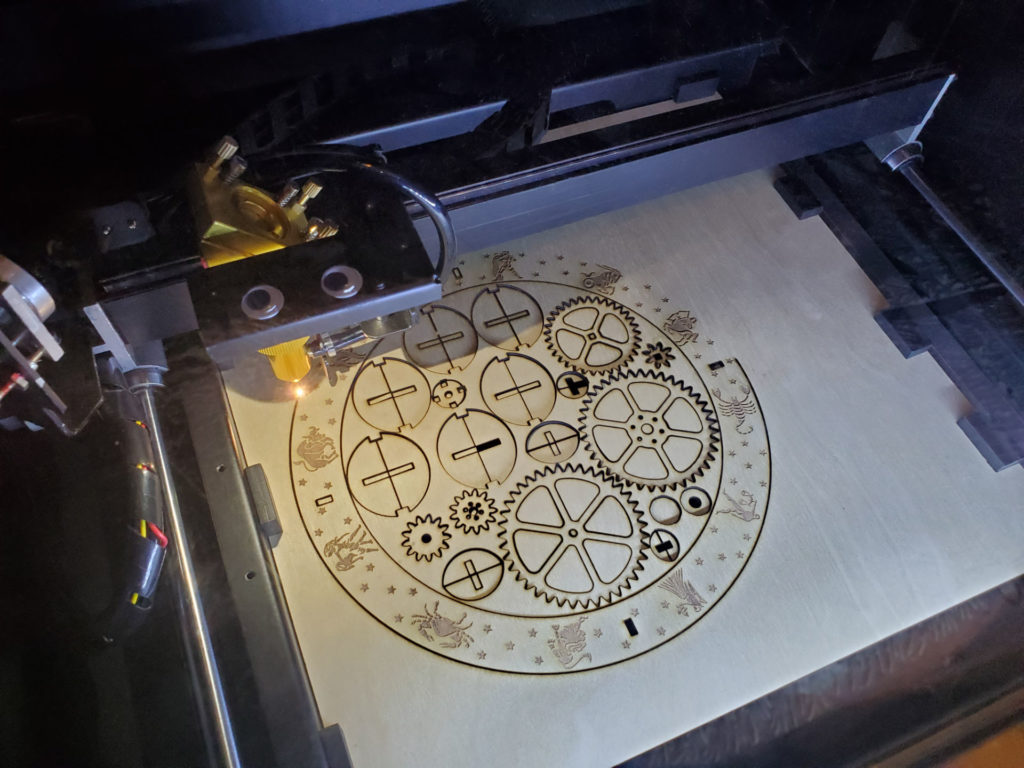
Wooden Orrery: Laser Cut Project
Orrery – Laser Cut Wood Project 5 Replies I’m having so much fun with my new Beamo laser cutter! I designed and made this wooden orrery with my Beamo. It’s a mechanical toy that depicts the position of the Earth and Moon as they orbit each other and the Sun, with artwork showing the moon phases and Zodiac. See more pictures and animation: All files are open source and available on my GitHub repo (click here)! I have provided the two SVG files to be cut on the laser cutter, optimized for the Beamo but should work on any other laser. The 3D models I designed using SolidWorks is also available. Assembly instructions are provided in the repo as well. Originally designed in SolidWorks. The parts were then exported to SolidWorks drawing files, then exported to DXF files, then imported into Inkscape to be edited as SVG files. Inside Inkscape, paths were joined together to optimize cutting. Paths that represented circles, squares, and slots, were converted into basic shapes so cut tolerances can be adjusted. Finally, the cutting order was organized into layers. Beam Studio will import the layers in the order you defined them. I learned the hard way that you need to make inner cuts first before outer cuts. Otherwise, if you do an outer cut first, the piece will move after being cut free and fall onto the laser’s honeycomb bed. This means the inner cut…

Geeky Stained Glass
It’s nearly Christmas again! I’ve started to learn a new craft, an ancient one, and started to mix it up with modern technology. Behold, stained glass suncatcher with embedded LEDs This is essentially black magic to most glass artists and a huge “duh” moment to all the makers and engineers. I’ve been asked to teach how this is done… Just a teaser preview of my second project Before I start talking about the geeky part, I’d like to summarize the basic steps in making a basic piece of stained glass artwork like this:


