Ha, that title makes me sound so evil.
See… this library actually leaves their 3D printers unsupervised, and the patrons use them how they please. I love it, getting people exposed to the latest tech is our goal. But this means that people do not realize how to properly remove filament from the printers, leading to tangles and knots in the filament spools. A single mistake could essentially render a $20 spool useless, it becomes a time bomb for printer jams, making people unhappy.
No amount of posters or instructions booklets could embed the same kind of discipline that a 3D printer owner has regarding filament treatment. Just a simple mistake of letting the filament go could cause a knot in the spool.
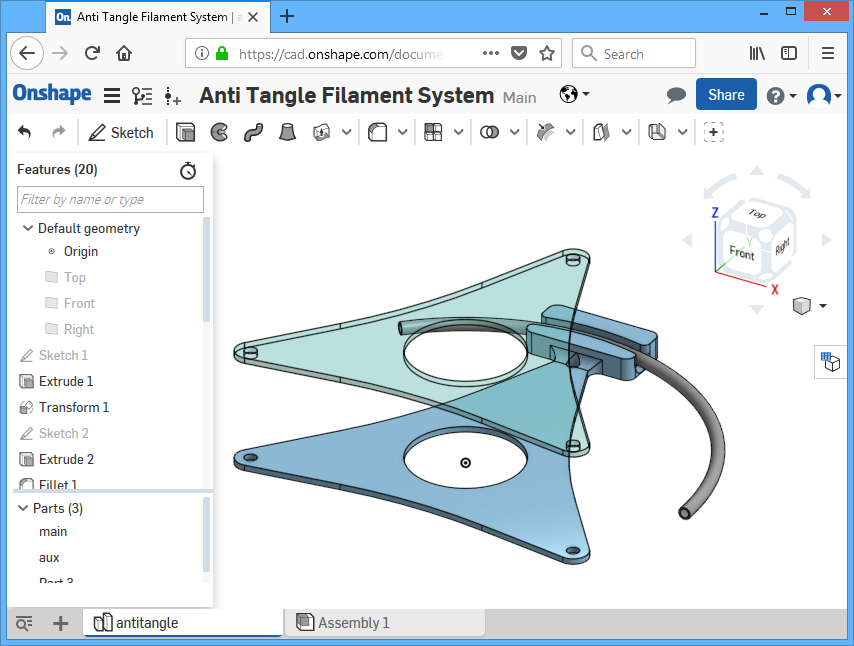
My solution… make them use cartridges that make it hard to make mistakes. These cartridges must be cheap, fast to make, easy to understand, reusable, and do not require modifying the printer to use. Don’t worry, there’s no DRM bull**** and they are adjustable to fit any standard spools. If my idea causes more problems than it solves, simply clip all the zip ties and go back to status-quo.

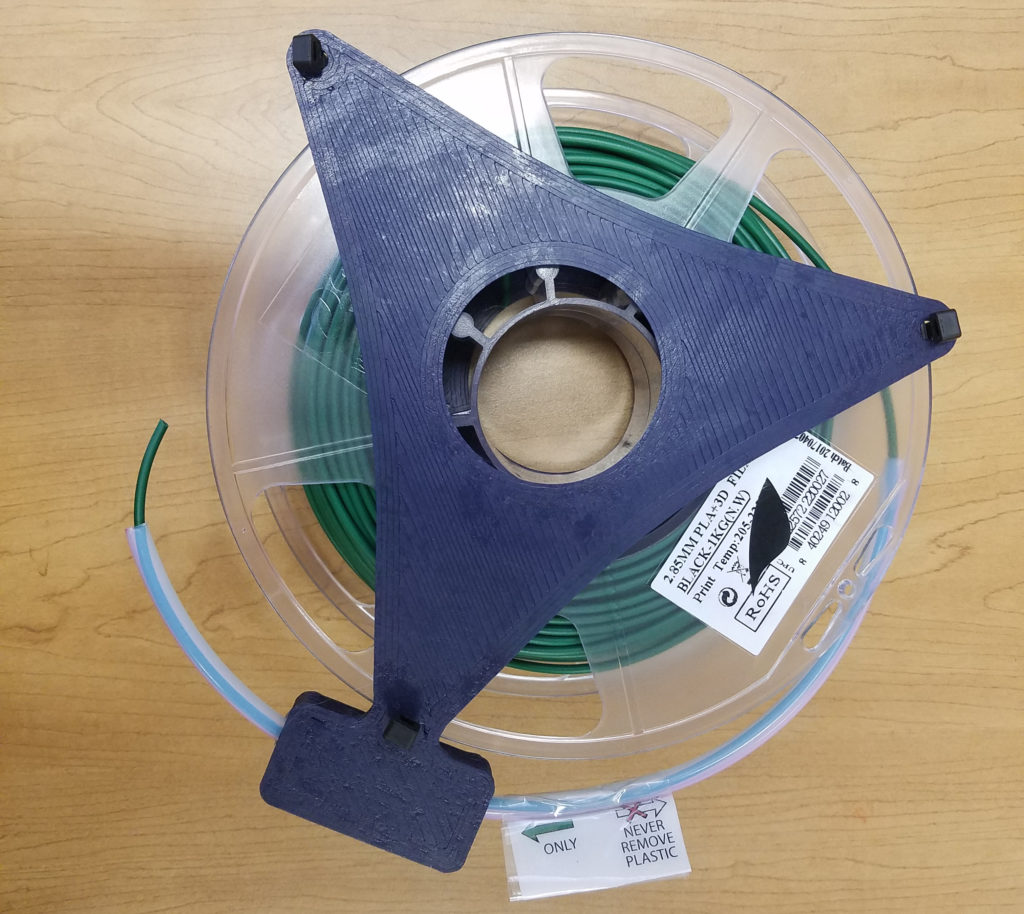
It’s just two plates, sandwiching a spool, with 3 zip ties to make sure the spool doesn’t fall out but still allow the spool to spin. The magic is the teflon tube that’s attached to one of the plates …
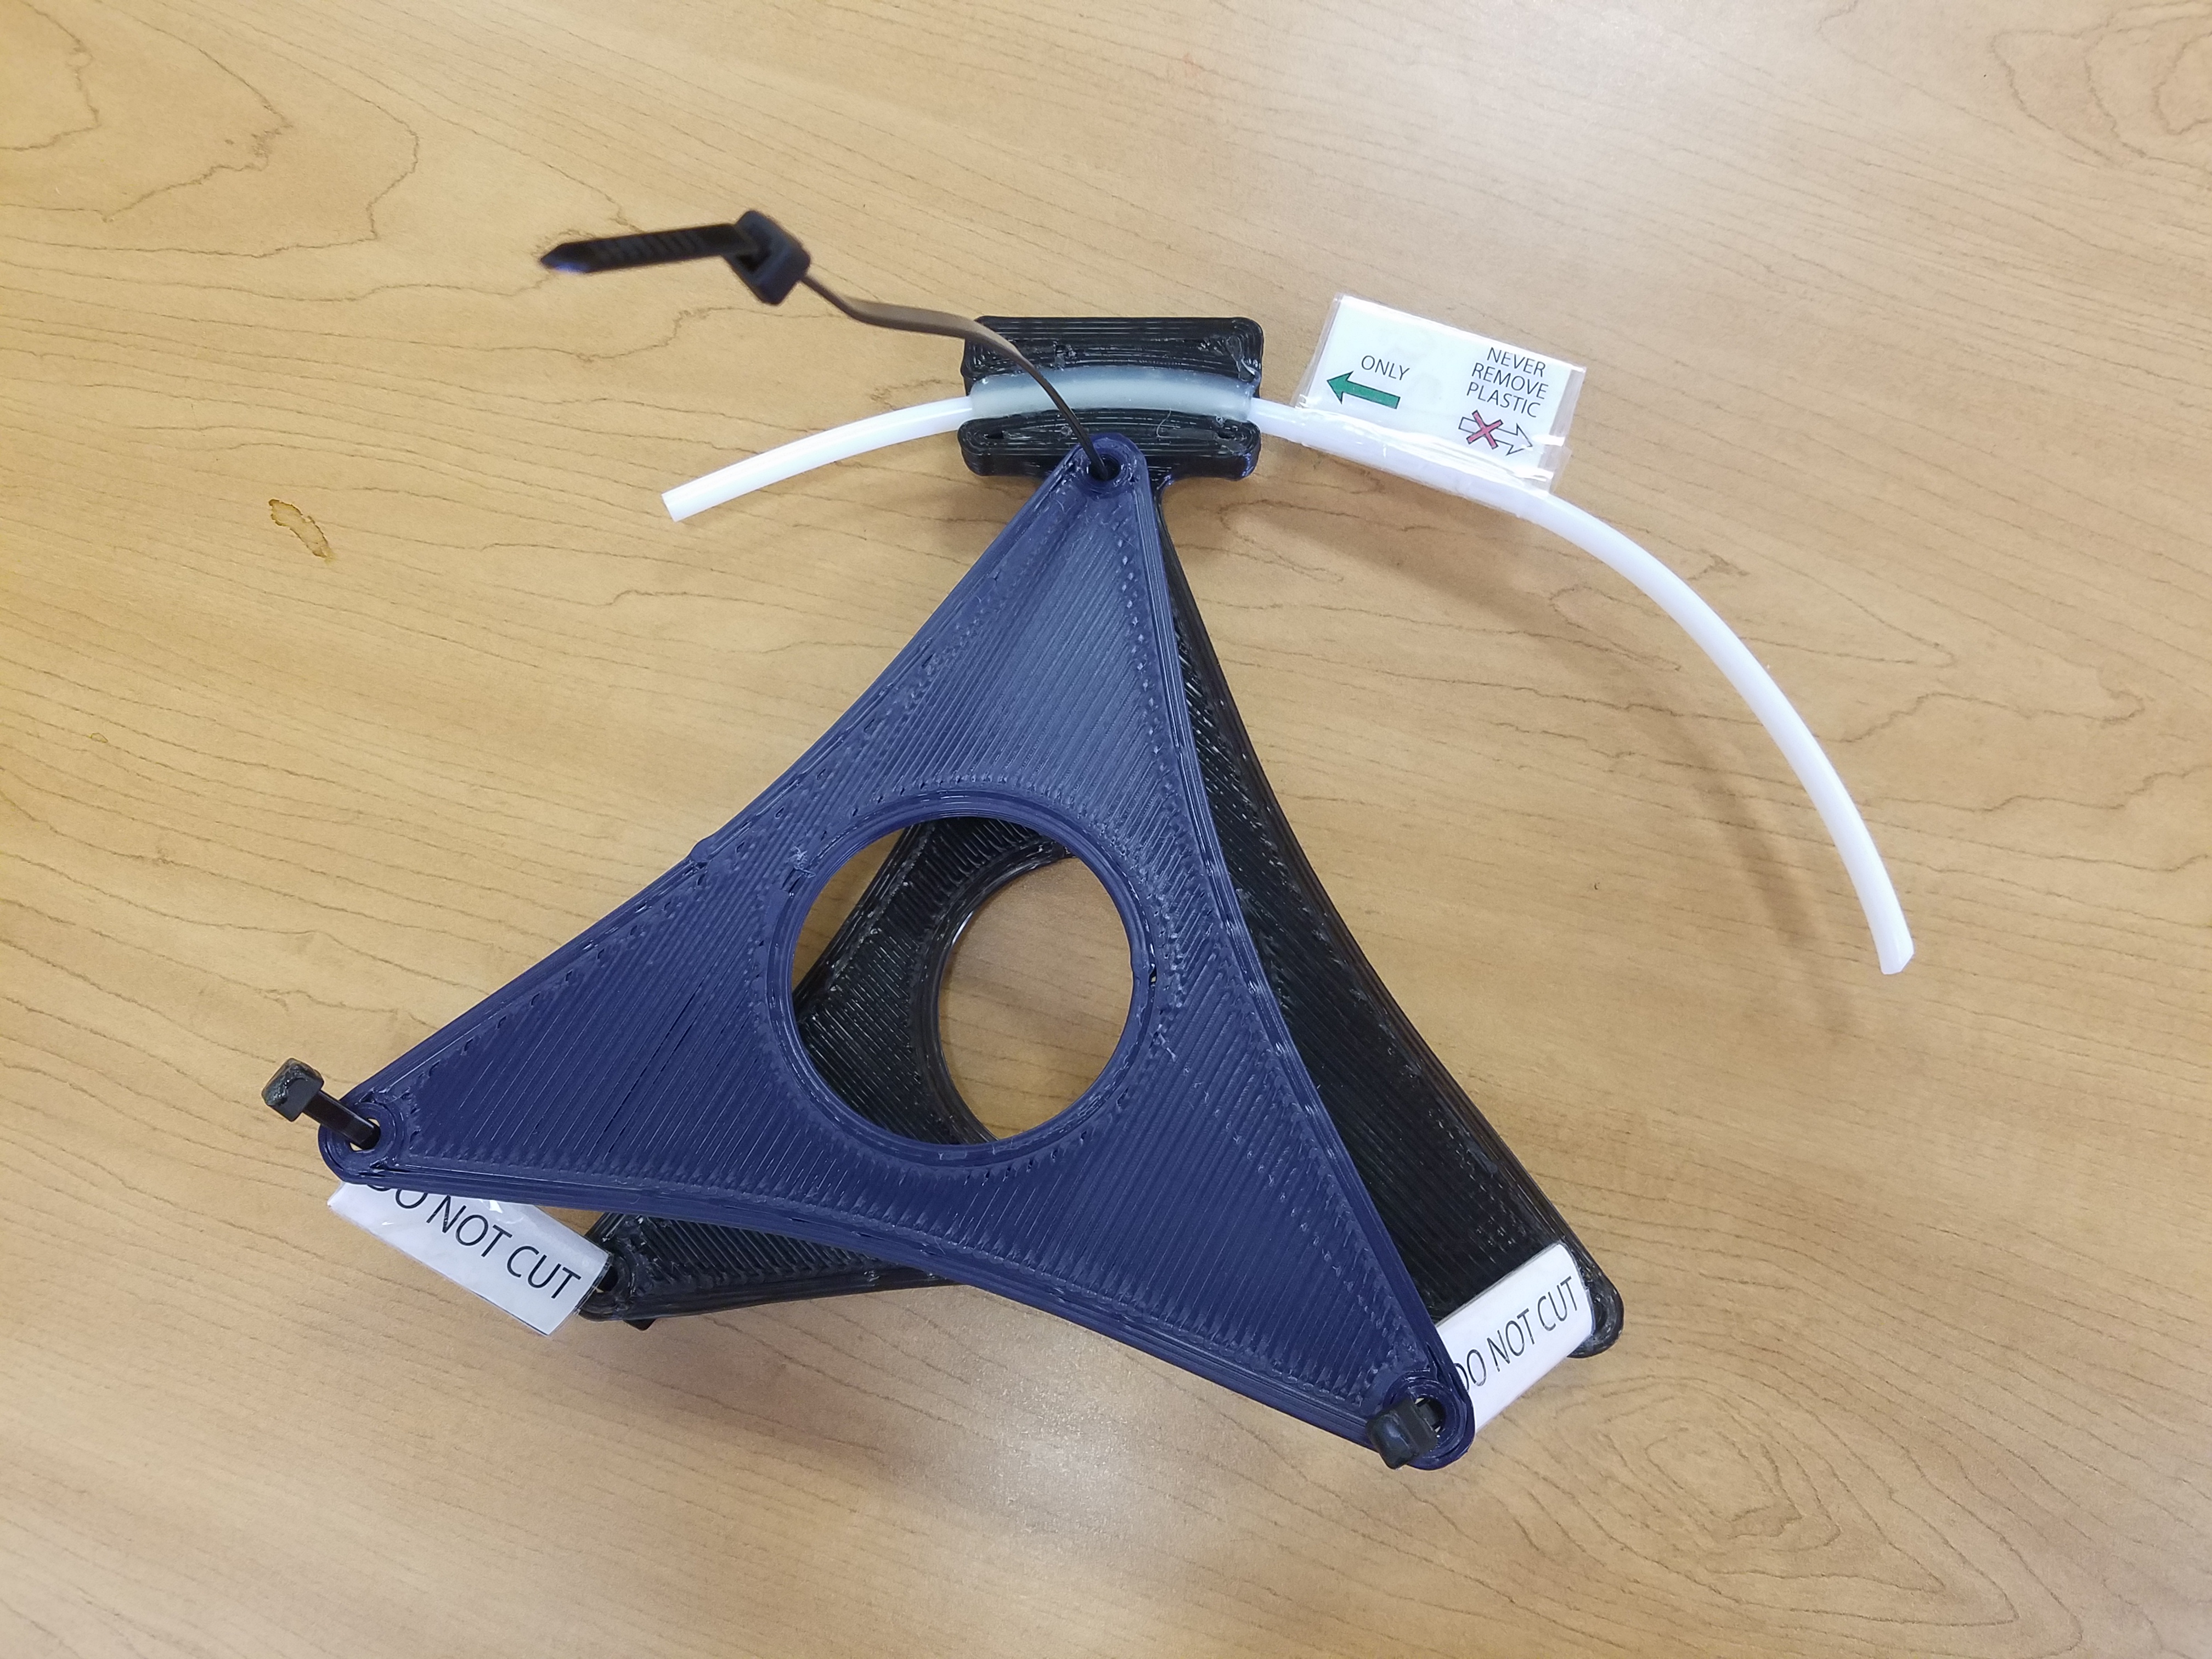
… which serves the purpose of controlling the bend radius to reduce feed resistance, and also to keep the filament captive. This means, when the filament is removed from the printer, the user doesn’t have to even think about holding on to the end of the filament, they don’t have to be disciplined and remember to secure the tail end of the filament.
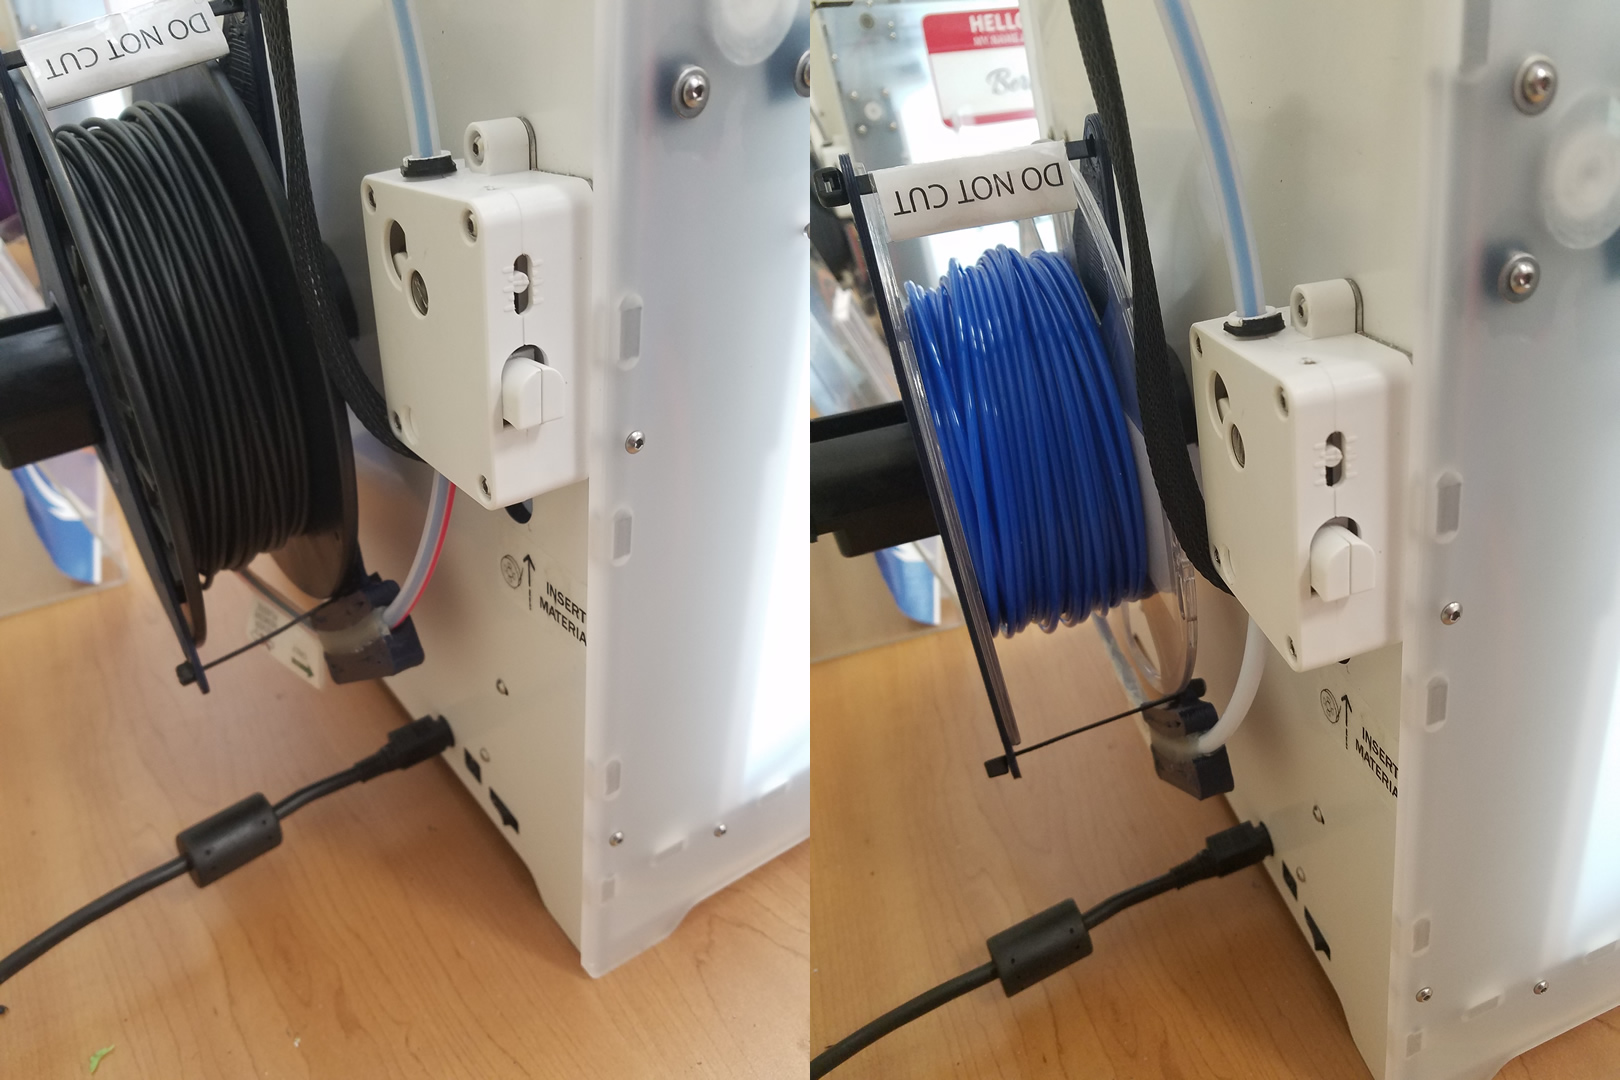
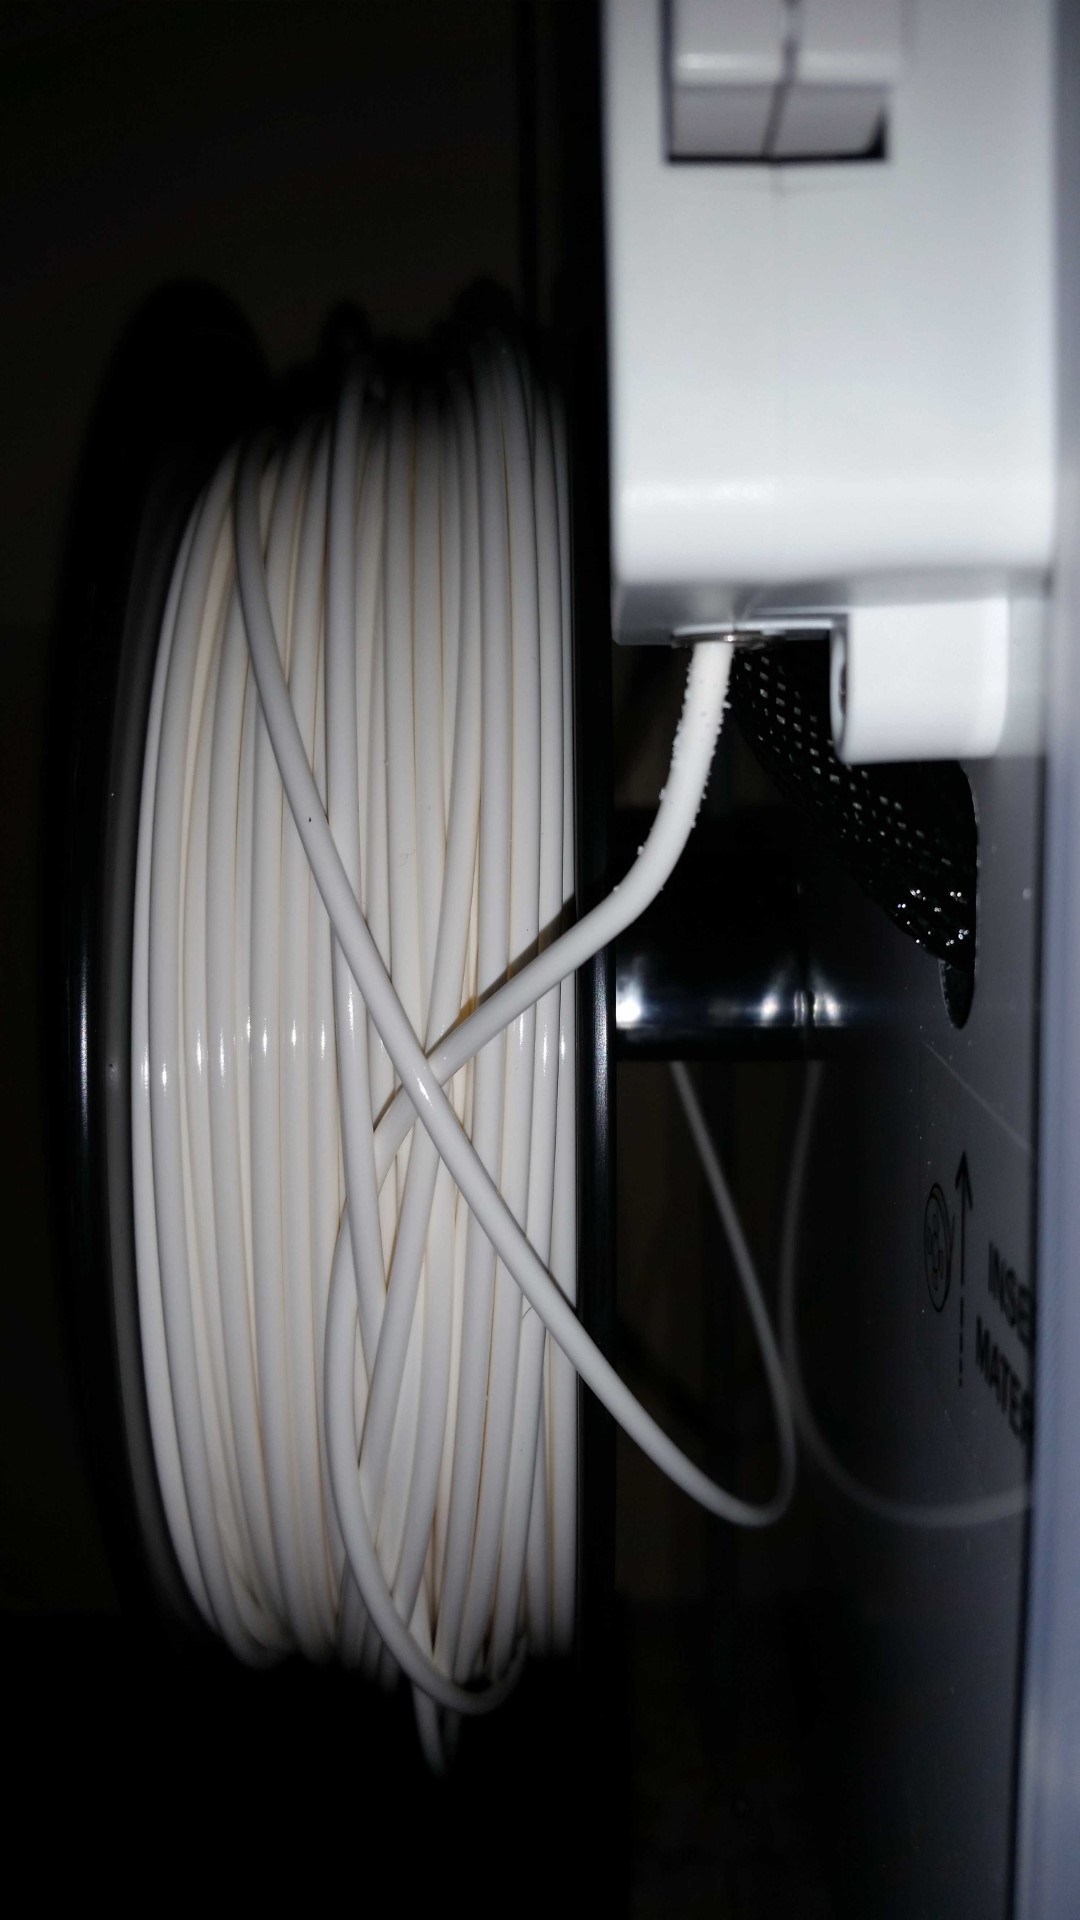
The end of the tube butts up against the extruder box naturally without needing to secure it. Teflon is used because it is very low friction. All of this means while the whole device does add a bit of feeding resistance, it still makes it easier for the filament to feed than the standard Ultimaker filament guide (which people forget to use, and is also broken on one printer).
I made a batch of 8. Despite the massive size, the plates prints really fast, because I am using a 1.5mm diameter nozzle. With a package of zip ties and a roll of teflon tubing, I can hammer out these cartridges really fast. I also have some very concise but easily understood labels on it so people can use it without any prior instructions.
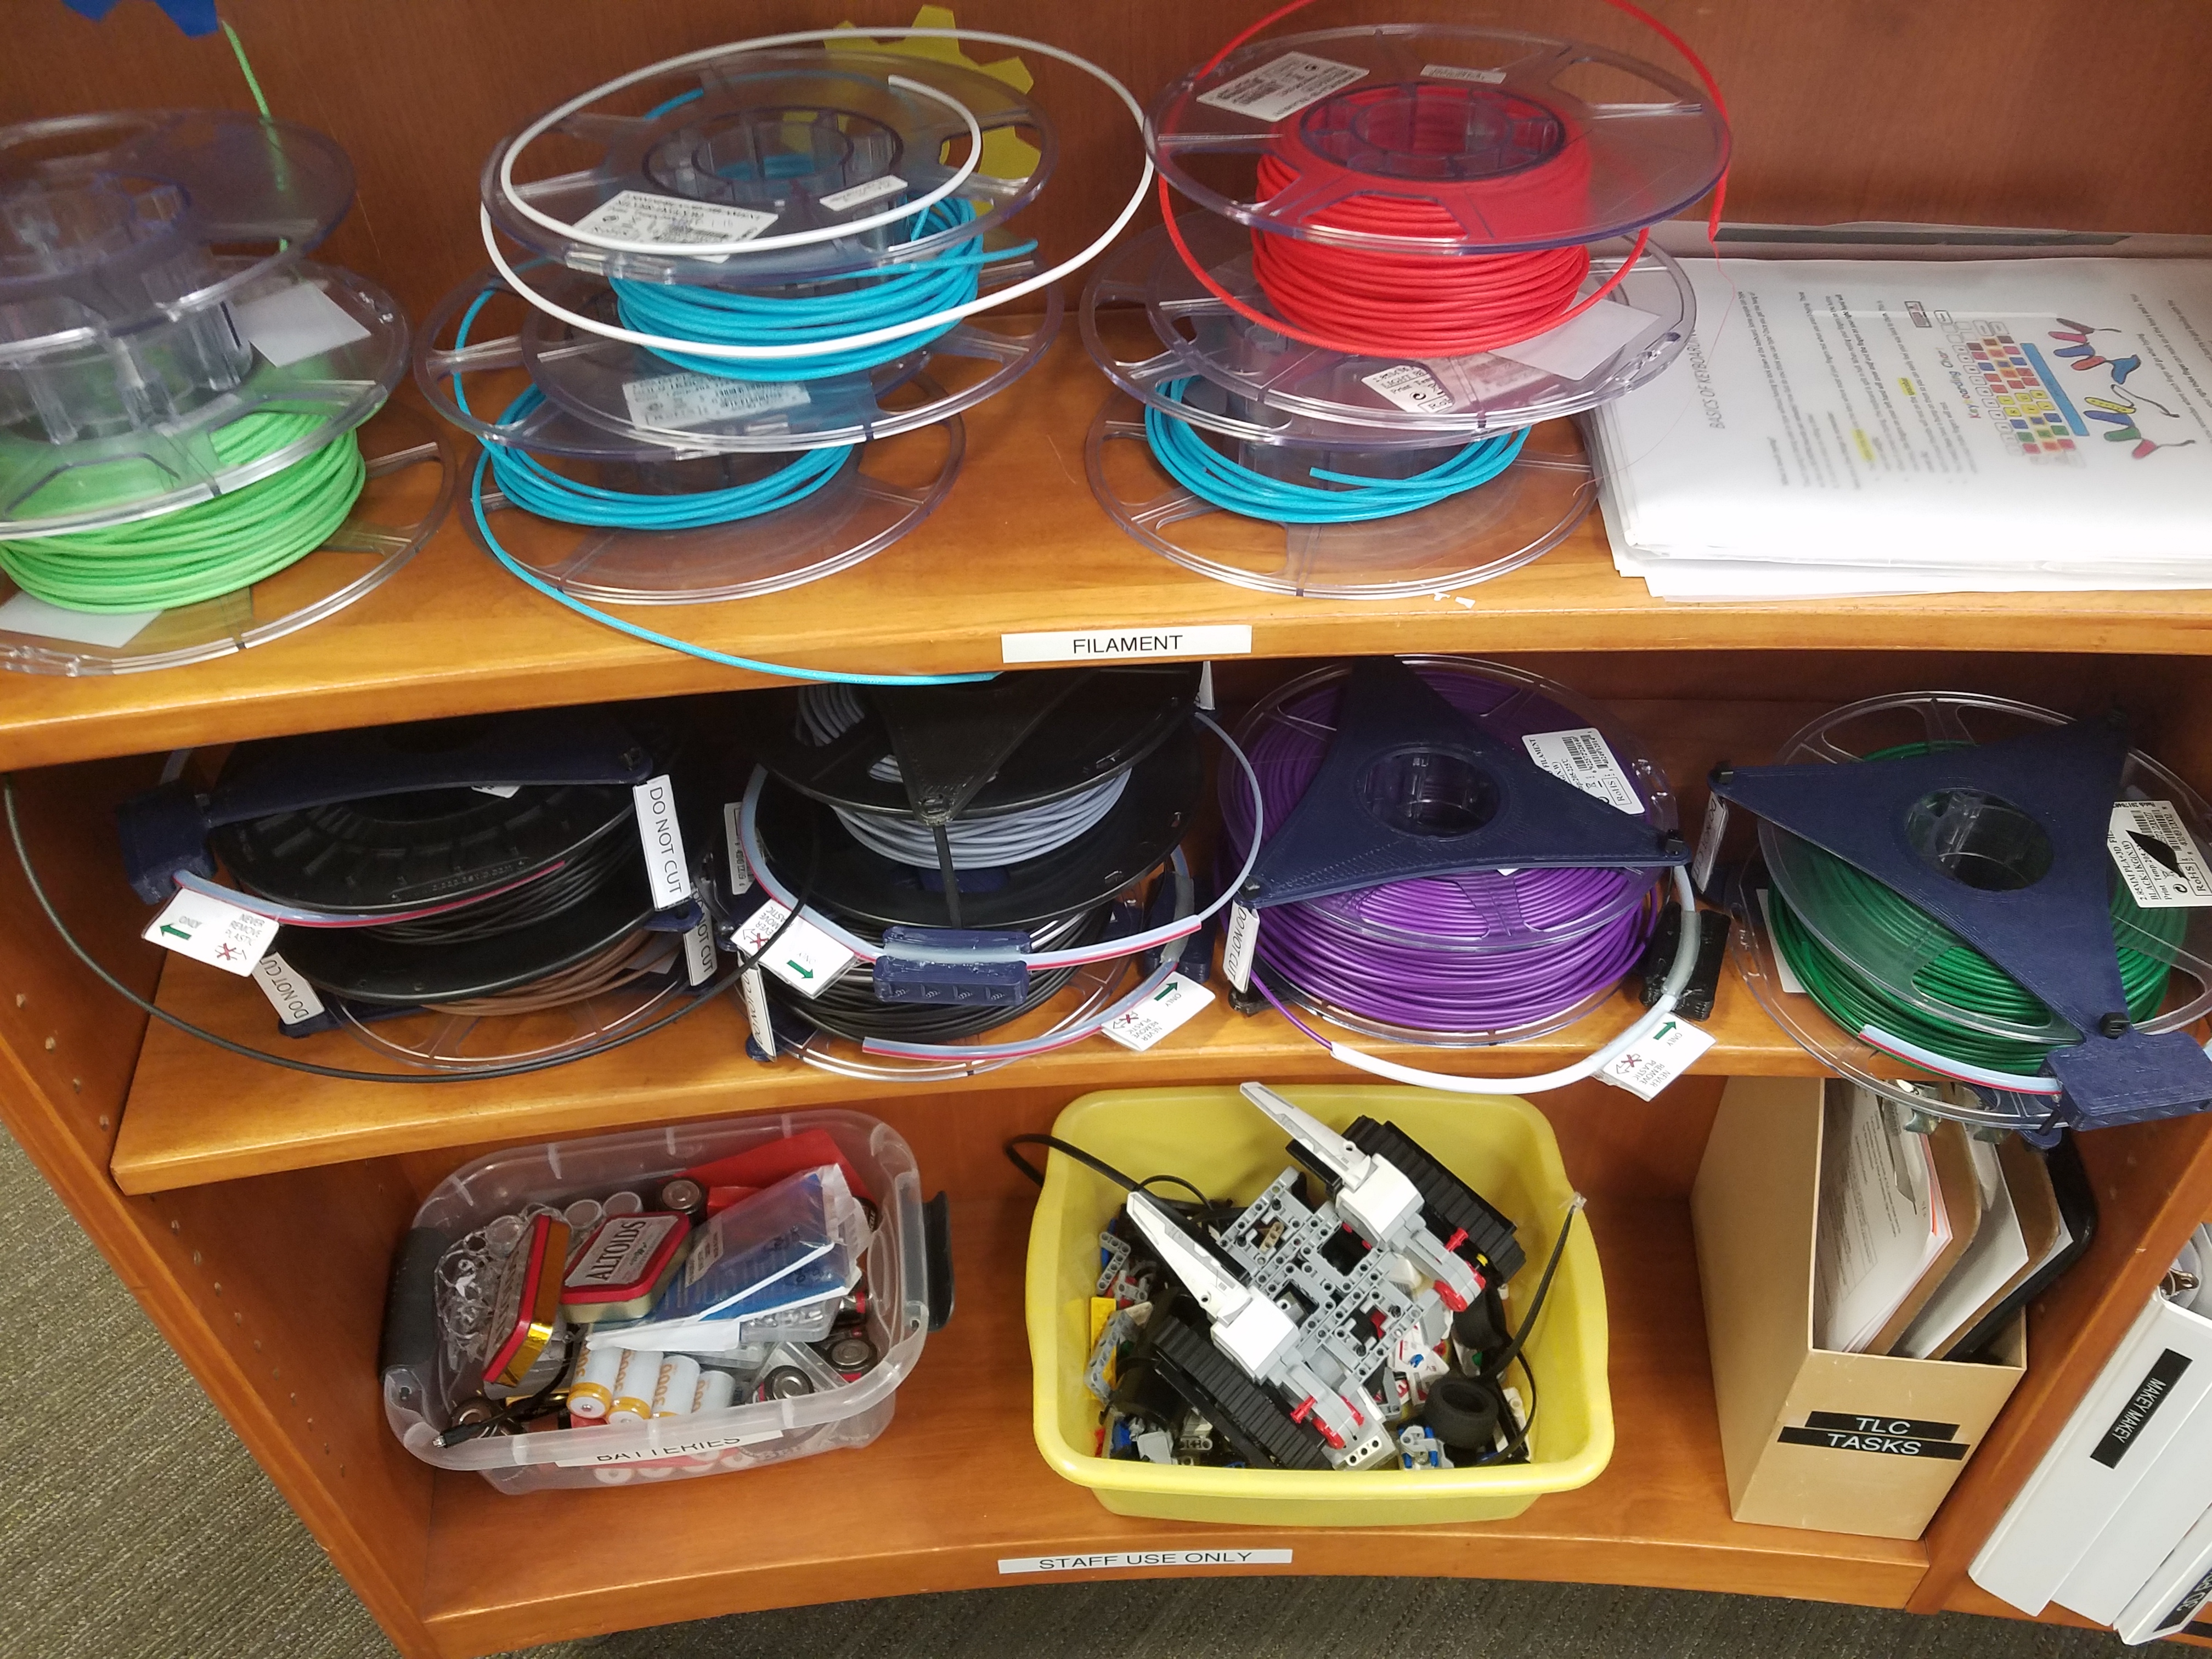
(notice the three light blue spools above, which is attributed to kids “problem solving” tangles with scissors)
When the spool is empty, just cut one of the zip ties, insert a new spool, and re-apply another zip tie. You could use other things instead of zip ties (possibly velcro, twist ties, shoe laces) but petty theft by 5 year olds is still a possibility, so I settled with zip ties with dabs of superglue.
Today was deployment day. I’m happy to report that I went to lunch and found that people have swapped the filament correctly without me even informing anybody about how to use them. So 1/2 mission accomplished, hopefully they work well and people notice that their prints stop failing so much.
This is what I do as a volunteer at the South San Francisco Public Library.


