Upgrading an LC Meter Kit: A DIY Enhancement Project

Upgrade Your Budget LC Meter Kit: A DIY Enhancement Project

The HU-053 LC Meter kit is a budget-friendly option for measuring capacitance, inductance, and frequency, available online. With its easy-to-solder components and transparent acrylic enclosure, it’s a great weekend project for electronics enthusiasts. But how accurate is it, and can we make it better?

Kit Contents and Assembly

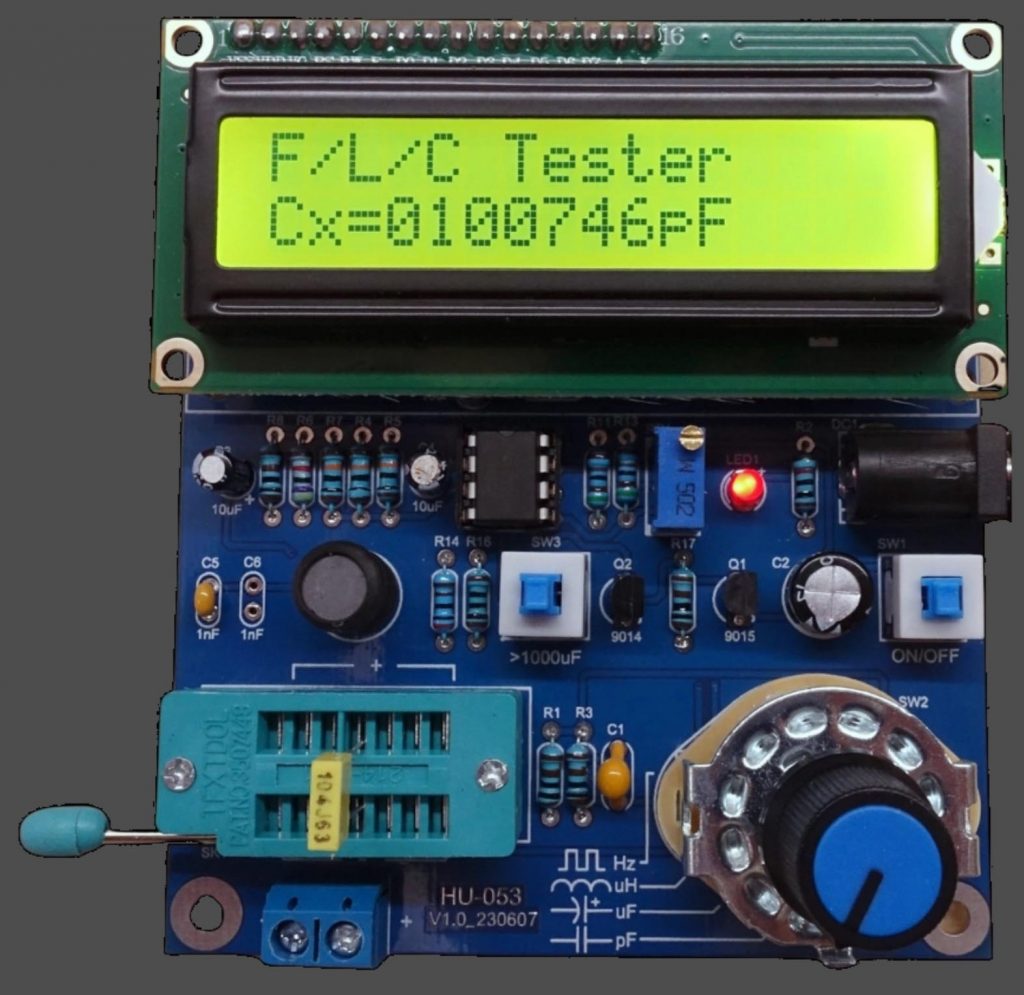
The HU-053 kit includes a double-sided PCB, a bag of components, a transparent acrylic enclosure, and all the necessary nuts and bolts for assembly. The assembled device measures 91 × 106 mm with a height of 28 mm, featuring an alphanumeric LCD, a 40-pin STC89C52RC microcontroller, a 3P4T function selection switch, and a ZIF socket for connecting the component to be tested. The unit is powered by a 5-V supply.

Improving the LC Meter’s Accuracy

After assembling and testing the device, we were disappointed to find that its accuracy was as low as its price. But this presented an opportunity to improve it! In this article, we’ll explore ways to enhance the HU-053 LC Meter’s performance, making it a more reliable measurement instrument.

Download the article to learn how to upgrade your budget LC Meter kit and turn it into a useful tool for your electronics projects.

Related Posts

Ultimaker2 Bearing Spool and Bearing Guide Upgrade

This is an upgrade to the Ultimaker2 3D printer for people who have spools that do not fit the original spool holder, and spools that are too tight and thus do not feed smoothly, causing under-extrusion. It is composed of two assemblies: a replacement for the filament guide and a replacement for the spool holder. Both utilizes ordinary skateboard bearings to achieve smooth rotation. The conical shape of the spool holder allows for any sized spool to be used, easily swapped because it uses a wing nut. Files are available on YouMagine. I want to emphasize that I am sharing the STEP files, not just STL, because STL are harder for people to import and modify than STEP files. SolidWorks files are also provided. The cross section images shows you how to assemble the upgrade parts. The screw diameters are #6 for the filament guide and 5/16″ for the spool holder. Please figure everything else out from the cross section images.

3D Printed Battery Recharge Dock for Parrot Rolling Spider

I got a Parrot Rolling Spider for fun. The batteries are 570mAH and the life is under 10 minutes, plus the reviews often mention that the batteries will lose their capacity quickly. Further research into this problem indicated that charging them slowly will alleviate this problem. I wanted a few spare batteries and a way to recharge them. I decided to DIY a dock for them. I had a handful of spare parts, such as the MCP73831 and plenty of small perfboards. All I needed to do was 3D print something to hold the batteries in place, and this is what I came up with. More pictures if you continue reading. The red LED is always on as long as there is power. When a battery is done recharging, a green LED will turn on. The MCP73831 are configured to charge at a slow 200mA each, totalling 400mA, which is under the 500mA limit for low power USB ports. Sure… I could’ve probably fit 6 batteries onto one board, standing vertically. But I didn’t want to actually buy 6 batteries for a toy. Sorry, no circuit diagram was drawn prior to the rapid prototype, but it’s nearly identical to the example circuit inside the MCP73812 datasheet. The battery connector is a 2199011-1 from TE Connectivity, or A120576 on Digi-Key. The design is shared on Onshape, click here. Print at around 27% infill and 1.2mm wall thickness. The…

Related Articles

Accurate EV Power Consumption Measurement: Introducing the LeoINAGPS System

  • August 25, 2024

Upgrading an LC Meter Kit: A DIY Enhancement Project

  • August 25, 2024

Aquarium Computer

  • August 6, 2024
Aquarium Computer

Ultimaker2 Bearing Spool and Bearing Guide Upgrade

  • August 6, 2024
Ultimaker2 Bearing Spool and Bearing Guide Upgrade

3D Printed Battery Recharge Dock for Parrot Rolling Spider

  • August 6, 2024
3D Printed Battery Recharge Dock for Parrot Rolling Spider

Using a Laptop as a Monitor for a Headless Raspberry Pi

  • March 7, 2024
Using a Laptop as a Monitor for a Headless Raspberry Pi