Geeky Stained Glass

It’s nearly Christmas again! I’ve started to learn a new craft, an ancient one, and started to mix it up with modern technology.

Behold, stained glass suncatcher with embedded LEDs

This is essentially black magic to most glass artists and a huge “duh” moment to all the makers and engineers. I’ve been asked to teach how this is done…

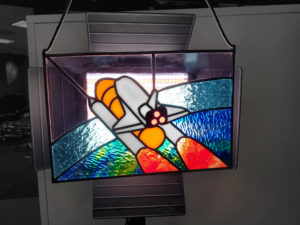
Just a teaser preview of my second project

Before I start talking about the geeky part, I’d like to summarize the basic steps in making a basic piece of stained glass artwork like this:

  1. Cut glass pieces with a glass cutter and specialized pliers, the shape can be rough for now.
  2. Use a glass grinder to grind each piece down to the exact shape they should be, and then check if they fit. Grind some more if you have to. Remember to leave a gap for the next step.
  3. Apply copper foil tape to all the edges.
  4. Using a soldering iron, solder all the glass together by the now-copper edges.
  5. Clean it. Optionally, apply patina to the solder to give it that dark aged look, and clean again.
    1. Those chain rings I made, they don’t take on patina very well unless you coat them in solder first. If you don’t, the tin will look black but flake off extremely easily. The soldering process makes a stronger bond with the copper inside the wire.
    2. The patina will be insulating, to get the circuit working, I rubbed each chain link against each other to get them conductive again.
    3. If you apply patina, you can still solder under it, it’s just difficult and require flux. For this job I used rosin flux for electronics instead of glass flux.
    4. It’s a good idea to do at least two passes with the soldering iron, any missed areas won’t react with the patina and will look like copper instead of black. Solder could be covering but not really soldered to some patches of copper, so it’s a good idea to just flux everything up a second time and do a second pass.

Related Posts

Accurate EV Power Consumption Measurement: Introducing the LeoINAGPS System

Unlocking EV Power Consumption Secrets: The LeoINAGPS System Measuring electric vehicle (EV) power consumption is crucial, but what if you could also track it in relation to the route, gradients, and altitudes? This innovative project makes it possible to detect basic electrical parameters of the traction motor and correlate them with the route, using a GPS receiver and Google Maps. The Inspiration Behind the Project A friend of mine, who uses an electric scooter for mobility, inspired this project. Living in a mountainous region with frequent steep climbs and descents, his scooter’s lead-acid batteries need to be replaced often. I wondered how much the scooter consumed in various conditions, considering an upgrade to high-performance lithium-ion batteries. The scooter features a heavy DC permanent-magnet motor and lead-acid batteries, unlike modern ebikes and scooters with compact, lightweight brushless motors and lithium batteries. The LeoINAGPS System I modified an existing system for measuring direct current (DC) load consumption to include a GPS receiver, allowing me to save the vehicle’s position and speed on a microSD card. This system can be applied to all electric vehicles, with adjustments to the shunt and voltage adapter. By tracking power consumption in relation to the route, we can gain valuable insights into EV performance and optimize battery life. For the GPS, I used my own functions to read speed, position, and UTC time. I discarded the GPS altitude reading, which has insufficient accuracy…

Aquarium Computer

My trusty laptop is showing its age. 8 GB of RAM is not enough for the amount of 3D stuff I do now, and it can’t run the latest games at all any more. Since I got a full time job now (instead of a constantly travelling student), it’s time to get a desktop PC (first PC build, yay). But the process of building a PC is pretty boring, it’s just an exercise of picking out compatible parts for the right price. I decided to make it slightly more interesting by submerging the entire computer in a fish tank full of mineral oil. UPDATE March 2015, I added a funny naked HDD activity indicator Some pictures from the build process Animated Loop Short Story (long story later, technical details and stuff): Intel i7 4790S, Nvidia GTX 970, H97M chipset, Corsair CX600M. Built onto a polycarbonate tray that is then dipped into a fish tank full of mineral oil. Fancy features like bubbling treasure chest, NeoPixel LED strip, oil pump+radiator, temperature monitoring, removable SSD. (part list? fine… here… these are not the prices I paid but here it is http://pcpartpicker.com/user/frank26080115/saved/HFDmP6) Comments and questions are welcome, I would love to chat with you! Reddit posts, please upvote: http://www.reddit.com/r/battlestations/comments/2pdd3q/aquarium_computer_mineral_oil_submerged_details/ and http://www.reddit.com/r/buildapc/comments/2pdeak/build_complete_aquarium_computer_mineral_oil/ Hi Hack a Day visitors, small correction: there’s 32 GB of RAM, I just didn’t put the same item twice in the part list. News/Updates will be posted at the bottom of this page…

Leave a Reply

Related Articles

Accurate EV Power Consumption Measurement: Introducing the LeoINAGPS System

  • August 25, 2024

Upgrading an LC Meter Kit: A DIY Enhancement Project

  • August 25, 2024

Aquarium Computer

  • August 6, 2024
Aquarium Computer

Ultimaker2 Bearing Spool and Bearing Guide Upgrade

  • August 6, 2024
Ultimaker2 Bearing Spool and Bearing Guide Upgrade

3D Printed Battery Recharge Dock for Parrot Rolling Spider

  • August 6, 2024
3D Printed Battery Recharge Dock for Parrot Rolling Spider

Using a Laptop as a Monitor for a Headless Raspberry Pi

  • March 7, 2024
Using a Laptop as a Monitor for a Headless Raspberry Pi