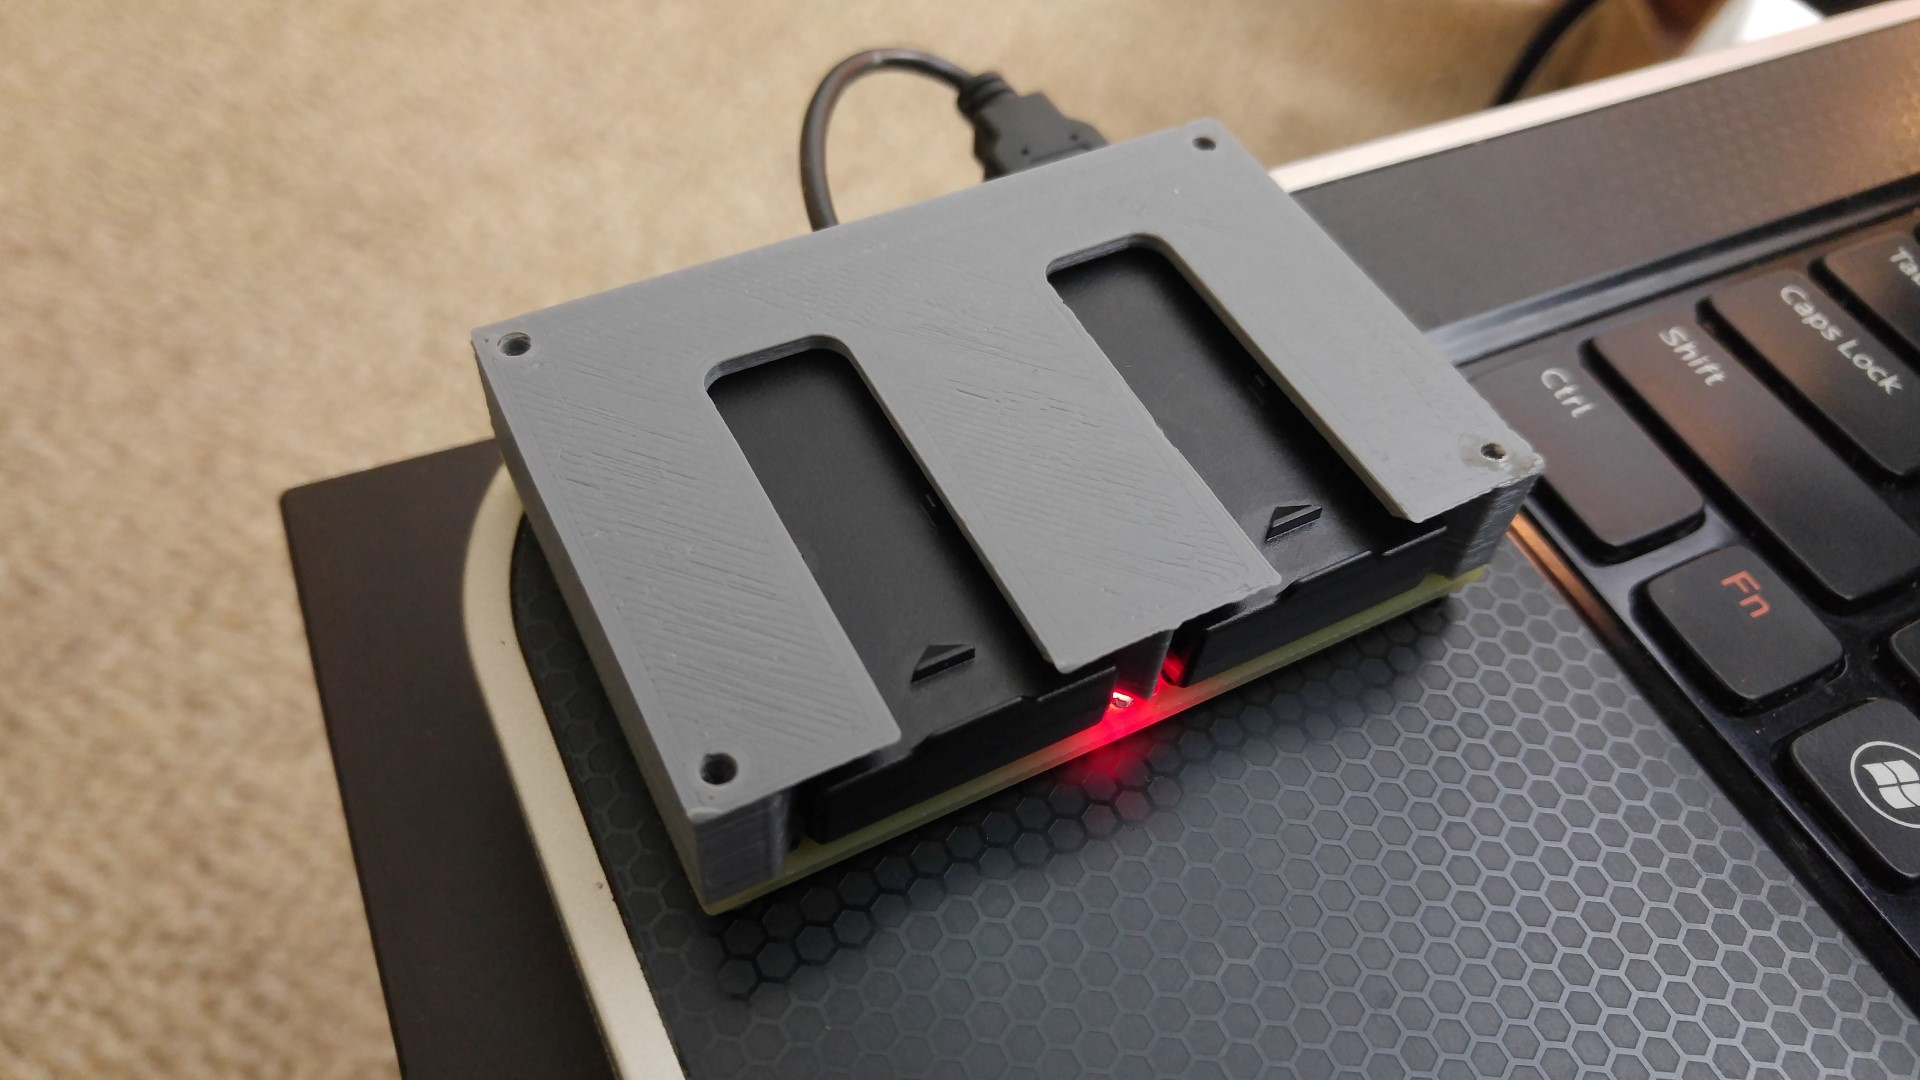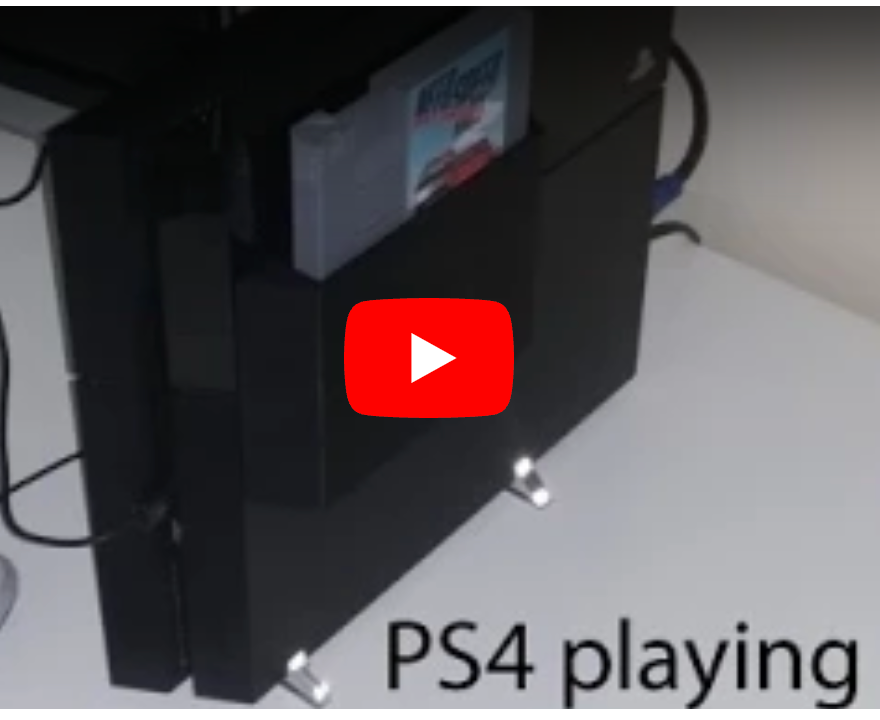
PS4 Playing NES Cartridges

Update March 2015

This project won 2nd place in this Reddit contest about functional 3D printed projects. Thank you very much to ToyBuilder Labs for being the sponsor.

Questions and Answers

  • Why not use a bigger 3.5″ drive? They can hold much more and cost much less.
    • I can edit the design anytime I want and 3D print it anytime I want, so I will definitely consider it.
    • But I had a few spare 2.5″ drives laying around.
    • The fake cartridge is a funny idea so I did it for the LULz! (and protects the drives)
    • Please note: 3.5″ drives will require an external 12 volt power supply, while 2.5″ drives only require the 5 volts from the motherboard.
  • What parts are needed?
    • #4-40 thread 0.25″ long countersunk machine screws, for holding the hard drives inside the cartridges
    • #4-40 thread 0.5″ long countersunk machine screws, for holding the dock to the cover
    • 0.5″ long nails to hold the SATA connector in place
    • something like this SATA extender, but note that this isn’t the exact same one I used, so you should measure it yourself and edit my files before printing my files
  • How did you connect the cable to the motherboard?
    • This was actually pretty hard, I ended up gluing a popsicle stick to the connector first, and then used the stick to poke the connector inside and into the motherboard’s connector.
    • This can be improved by some sort of 3D printed dummy drive, but I got tired and wanted to wrap the project up.
  • In the picture of the Ultimaker, why do the plastic look a bit rough?
    • Those are failed prints, I only used them for the picture, specifically because the roughness emphasizes the fact that they are 3D printed.
    • The final good prints are so good that you cannot tell that they are actually 3D printed. The Ultimaker is very high quality.
  • Why didn’t you launch the game?
    • I didn’t connect the system to my network, so the PS4 didn’t let me launch them, since they are all digitally downloaded and thus require authorization first
    • Don’t worry, they all work once connected to the internet.
  • I’ve seen something similar before…
    • Adding a hard drive to the PS4 using SATA extensions isn’t a new idea at all, somebody already added 6 TB to it, using a 3.5″ drive, but he used a external enclosure and a external 12 volt power supply.
    • I went to CES2015 and saw Nyko’s Data Bank. I want to make it clear that I started my design a long time before Christmas, and was not inspired or influenced by Nyko
  • Ask me a question, if it is a popular question, I will answer it here.

You want files? Click Here. I hosted the files on YouMagine, and I provided the STEP file format, which you should be able to open with most 3D modeling software. So if you want to change the design for 3.5″ drives, or chose another cartridge shape, you can!

NOTE: the dimensions of the fake NES cartridge I used are not the same dimensions as genuine NES cartridges, so genuine cartridges will not fit in this project, and the fake cartridges will not fit inside a genuine NES deck.
Related Posts

Accurate EV Power Consumption Measurement: Introducing the LeoINAGPS System

Unlocking EV Power Consumption Secrets: The LeoINAGPS System Measuring electric vehicle (EV) power consumption is crucial, but what if you could also track it in relation to the route, gradients, and altitudes? This innovative project makes it possible to detect basic electrical parameters of the traction motor and correlate them with the route, using a GPS receiver and Google Maps. The Inspiration Behind the Project A friend of mine, who uses an electric scooter for mobility, inspired this project. Living in a mountainous region with frequent steep climbs and descents, his scooter’s lead-acid batteries need to be replaced often. I wondered how much the scooter consumed in various conditions, considering an upgrade to high-performance lithium-ion batteries. The scooter features a heavy DC permanent-magnet motor and lead-acid batteries, unlike modern ebikes and scooters with compact, lightweight brushless motors and lithium batteries. The LeoINAGPS System I modified an existing system for measuring direct current (DC) load consumption to include a GPS receiver, allowing me to save the vehicle’s position and speed on a microSD card. This system can be applied to all electric vehicles, with adjustments to the shunt and voltage adapter. By tracking power consumption in relation to the route, we can gain valuable insights into EV performance and optimize battery life. For the GPS, I used my own functions to read speed, position, and UTC time. I discarded the GPS altitude reading, which has insufficient accuracy…

Aquarium Computer

My trusty laptop is showing its age. 8 GB of RAM is not enough for the amount of 3D stuff I do now, and it can’t run the latest games at all any more. Since I got a full time job now (instead of a constantly travelling student), it’s time to get a desktop PC (first PC build, yay). But the process of building a PC is pretty boring, it’s just an exercise of picking out compatible parts for the right price. I decided to make it slightly more interesting by submerging the entire computer in a fish tank full of mineral oil. UPDATE March 2015, I added a funny naked HDD activity indicator Some pictures from the build process Animated Loop Short Story (long story later, technical details and stuff): Intel i7 4790S, Nvidia GTX 970, H97M chipset, Corsair CX600M. Built onto a polycarbonate tray that is then dipped into a fish tank full of mineral oil. Fancy features like bubbling treasure chest, NeoPixel LED strip, oil pump+radiator, temperature monitoring, removable SSD. (part list? fine… here… these are not the prices I paid but here it is http://pcpartpicker.com/user/frank26080115/saved/HFDmP6) Comments and questions are welcome, I would love to chat with you! Reddit posts, please upvote: http://www.reddit.com/r/battlestations/comments/2pdd3q/aquarium_computer_mineral_oil_submerged_details/ and http://www.reddit.com/r/buildapc/comments/2pdeak/build_complete_aquarium_computer_mineral_oil/ Hi Hack a Day visitors, small correction: there’s 32 GB of RAM, I just didn’t put the same item twice in the part list. News/Updates will be posted at the bottom of this page…

Related Articles

Accurate EV Power Consumption Measurement: Introducing the LeoINAGPS System

  • August 25, 2024

Upgrading an LC Meter Kit: A DIY Enhancement Project

  • August 25, 2024

Aquarium Computer

  • August 6, 2024
Aquarium Computer

Ultimaker2 Bearing Spool and Bearing Guide Upgrade

  • August 6, 2024
Ultimaker2 Bearing Spool and Bearing Guide Upgrade

3D Printed Battery Recharge Dock for Parrot Rolling Spider

  • August 6, 2024
3D Printed Battery Recharge Dock for Parrot Rolling Spider

Using a Laptop as a Monitor for a Headless Raspberry Pi

  • March 7, 2024
Using a Laptop as a Monitor for a Headless Raspberry Pi